
This is an uncomplicated, straight-forward loaf. I was aiming for the simplest, shortest method, with the most basic ingredients (no dairy/eggs) without sacrificing taste and texture. And this is it! A soft, chewy, absolutely delicious loaf. It’s a perfect for “working from home” loaf because the short steps are worked hours apart.

Step 1 | Prepare the autolyse and let rest 2-1/2 hours
- 425 grams whole wheat flour
- 1 Tablespoon vital wheat gluten (optional)
- 320 grams cool water (not lukewarm)
- Measure the flour and water in the bowl of a stand mixer
- Mix to combine with the stick end of a wooden spoon. You’re not kneading (yet!), just making sure there’s no bits of dry flour.
- With your hand, use the dough to scrape any flour off the sides, press it against the sides and squeeze it a bit, so you’ve got a rough ball (not a “shaggy” dough)
- Cover and let rest for 2-1/2 hours

Step 2 | Add ingredients and knead. Be careful to not over-knead this dough. Wheat flour contains flakes of bran which can cut the dough like knives, and therefore it won’t stretch to rise, it’ll just break.
- 7 grams instant yeast
- 1/4 cup brown sugar
- 55 grams water
- 28 grams canola oil (or some other neutral oil)
- 11 grams salt
- Mix the yeast, sugar and water together.
- Add the liquids to the autolyse and mix on low speed with the paddle until well combined, scrapping sides when necessary.
- Add salt and continue mixing for about 4 minutes.
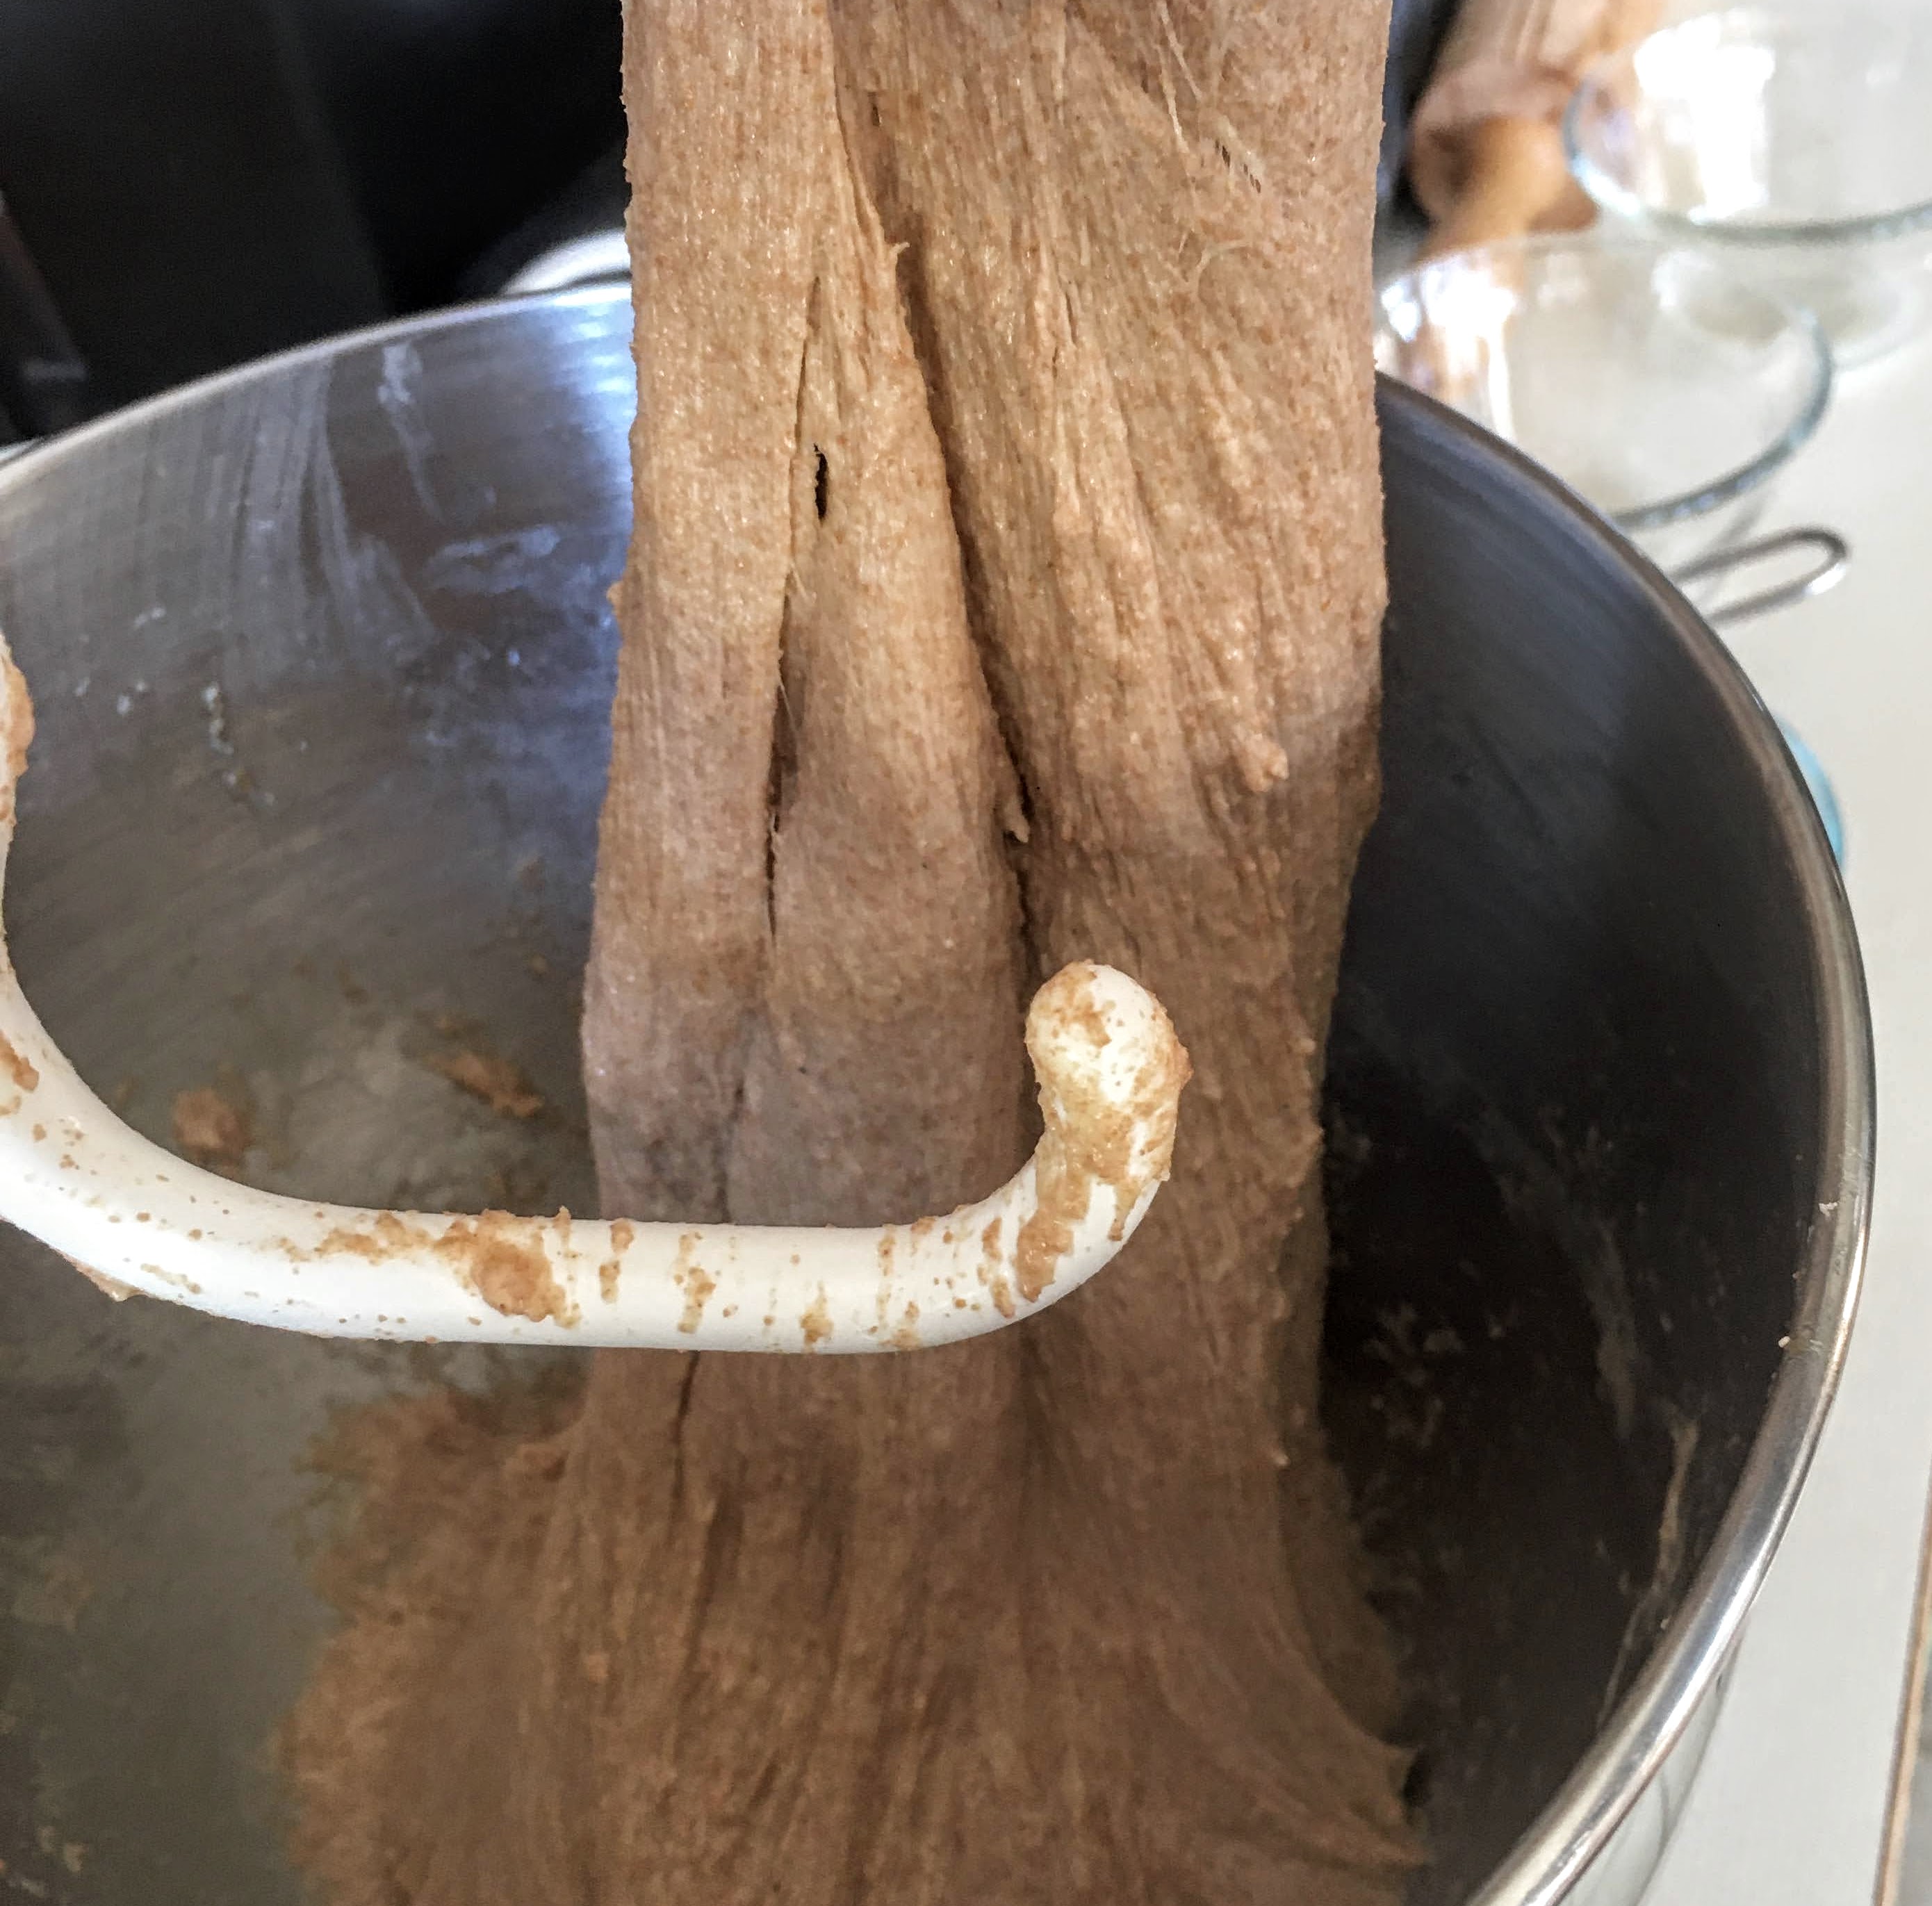
- Switch to dough hook, and knead for 4 ~ 6 minutes, on medium speed . Stop clock every 2 minutes to scrape dough off the hook, then resume kneading on medium speed.
- Dough is ready when you can pull a portion up without the strand breaking, and it passes the windowpane test. Never heard of that? Here’s a great explanation from my favorite instructional videos, the Bake with Jack series. (Because it’s such a wet dough, it won’t come away from the sides. That’s okay.)
Step 3 | Second Rise: 1 ~ 2 hours
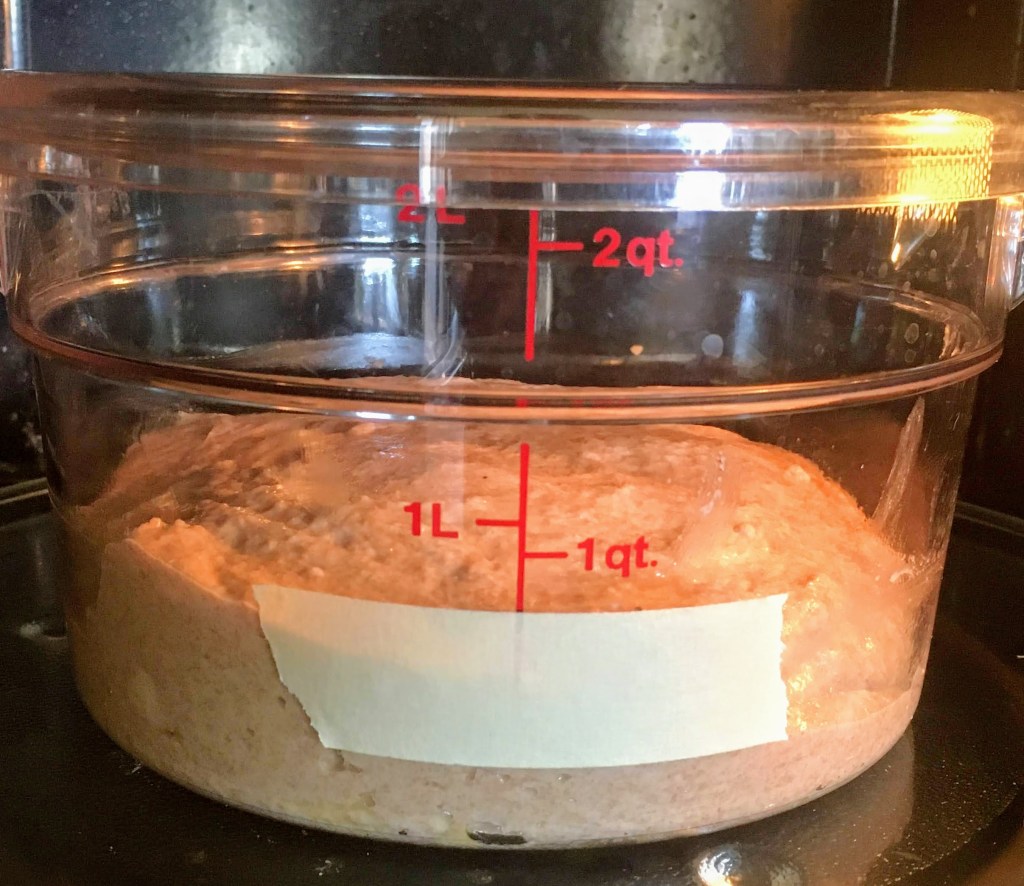
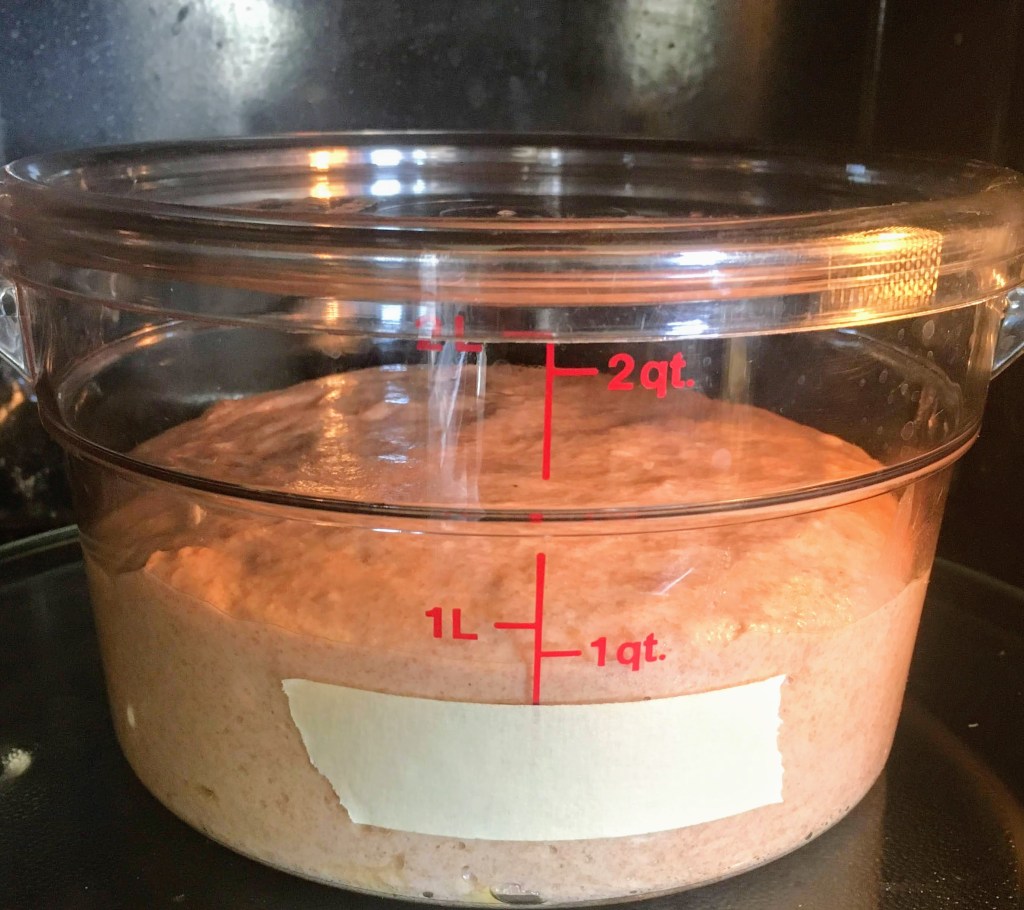
- Place in lightly oiled container, cover and let rise until doubled. Room temperature should be about 75 – 78 degrees. I use the microwave — turning it on for 30 seconds – EMPTY – to heat it up, then storing the dough for proofing.
Be patient! This can take up to 2 hours, but can vary – keep checking it to make sure it doesn’t over-rise. These photos were take the start, 1 hour later, 1-1/2 hours later, then 2 hours. Ready!


Step 4 | Shape Loaf
- Lightly dust counter-top with whole wheat flour
- Lightly punch the dough down to remove the air.
- Carefully remove dough all at once from bowl onto counter top, scrapping from the bottom. Don’t have it slowly come out in a long, stringy way.
- Dust top very lightly with flour, then gently pat the dough into a 7″ square, getting some of the air out
- Roll/fold, using the “head and shoulders” method, into a tight roll, then place into loaf pan, seam side down

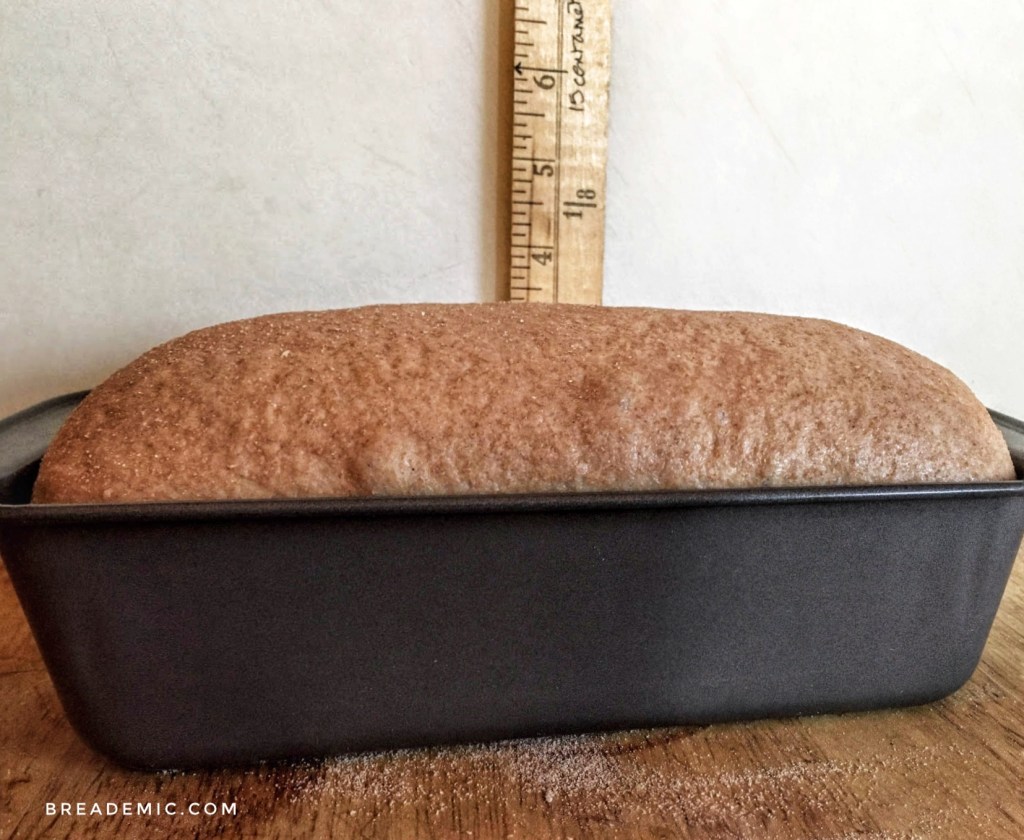
Step 4 | Third Rise: 60 ~ 75 minutes
- Cover loosely with a tea towel, plastic wrap for the last rise. This can take anywhere from 45 – 90 minutes, and it should be about 1 to 1-1/2 inches above the rim of the pan. Check frequently so it does not over-proof. Here’s another video from Jack on how to know if your dough is done rising.
- Preheat the oven to 350 while you wait.
Step 5 | Bake!
- Bake for about 45 minutes in the lower 3rd of a 350 oven.
- Internal temperature should be 200 degrees.
- Remove from tin and cool on a wire rack.
- Do not cut until it’s completely cool! Here’s why.
