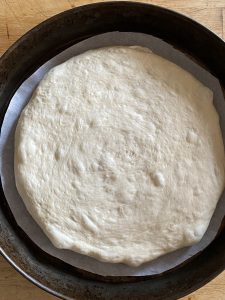
This comes our way via Alexandra’s Kitchen. It’s easy, fast and satisfying to make. She’s also got a version made with 50% whole wheat, instructions for baking in loaf pans if you prefer sliced sandwich bread, and suggestions on adding toppings, making it with gluten free flour, etc.
I’ve listed the ingredients so you can have them at the ready, then follow along in the video linked below. Link to full written recipe here.
4 cups (512 g) all-purpose or bread flour
2 teaspoons (10 g) salt
2 cups (454 g) lukewarm water (made by mixing 1.5 cups cold water with 0.5 cup boiling water)
NEW ORLEANS by way of SICILY: A focaccia-type bun, that was traditionally served for breakfast during Festa dei Morti (Day of the Dead), and topped with olive oil, anchovies, oregano, and caciocavallo cheese. It’s ties to New Orleans are through Salvatore Lupo, an Italian immigrant who opened the Central Grocery & Deli in the French Quarter, and began making his own version of the stuffed focaccia. Legend says that at lunchtime, farmers would buy a loaf of muffuletta bread, sliced deli meats, olives and cheese, and then proceed to eat standing up. Lupo decided to put all the ingredients together in a sandwich to make it easier for them to enjoy their lunch.
Today’s muffuletta sandwich feeds 4-6 people and is made with a large 14″ round loaf. It consists of layers of marinated olive salad, mortadella, salami, ham, and provolone, mozzarella and Swiss cheeses. Although Central Grocery has been closed since Hurricane Ida, you can still order a muffuletta and/or jars of their olive salad to ship anywhere in the U.S. And, here’s a good recipe for olive salad if you want to make your own.
Napoleon House is another place in the Quarter that folks like to go for their muffuletta. They serve the sandwich heated, which I prefer because then the crust is crunchy, but of course, there’s a TON of controversy surrounding that!
how to make a muffaletta
This version is adapted form the muffaletta recipe on the King Arthur Baking website. I used the ingredients exactly as listed, and it produces a superb loaf. But my method is a little different, so I’ve written out instructions below. And be forwarned: timing is a factor, and it’s important to figure out what schedule you’re going to follow before you begin. You can start in the evening, before you go to bed, or first thing in the morning. Also, you need a 14″ pizza pan to bake the bread.
Start just before bedtime
Start in the morning
10:00pm – 8:00am, First rise, 8 hours
10:00AM – 6:00pm, First rise 8 hours
9:00am – 10:00am, 2nd rise: 1 hour
6:00pm – 7:00pm, 2nd rise: 1 hour
10:30am – 12:30pm, 3rd rise: 2 hours
8:30pm – 10:30pm, 3rd rise: 2 hours
1:00pm – 9:00pm, 4th rise: 8 hours
11:00pm – 8:00am, 4th rise: 9 hours
9:30pm -10:00pm, 5th rise: 30 minutes
8:30am -9:00am, 5th rise: 30 minutes
Step 1: Make starter (8 hour rest)
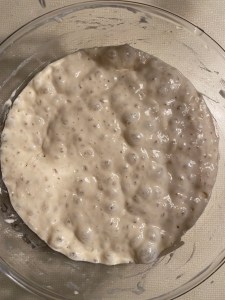
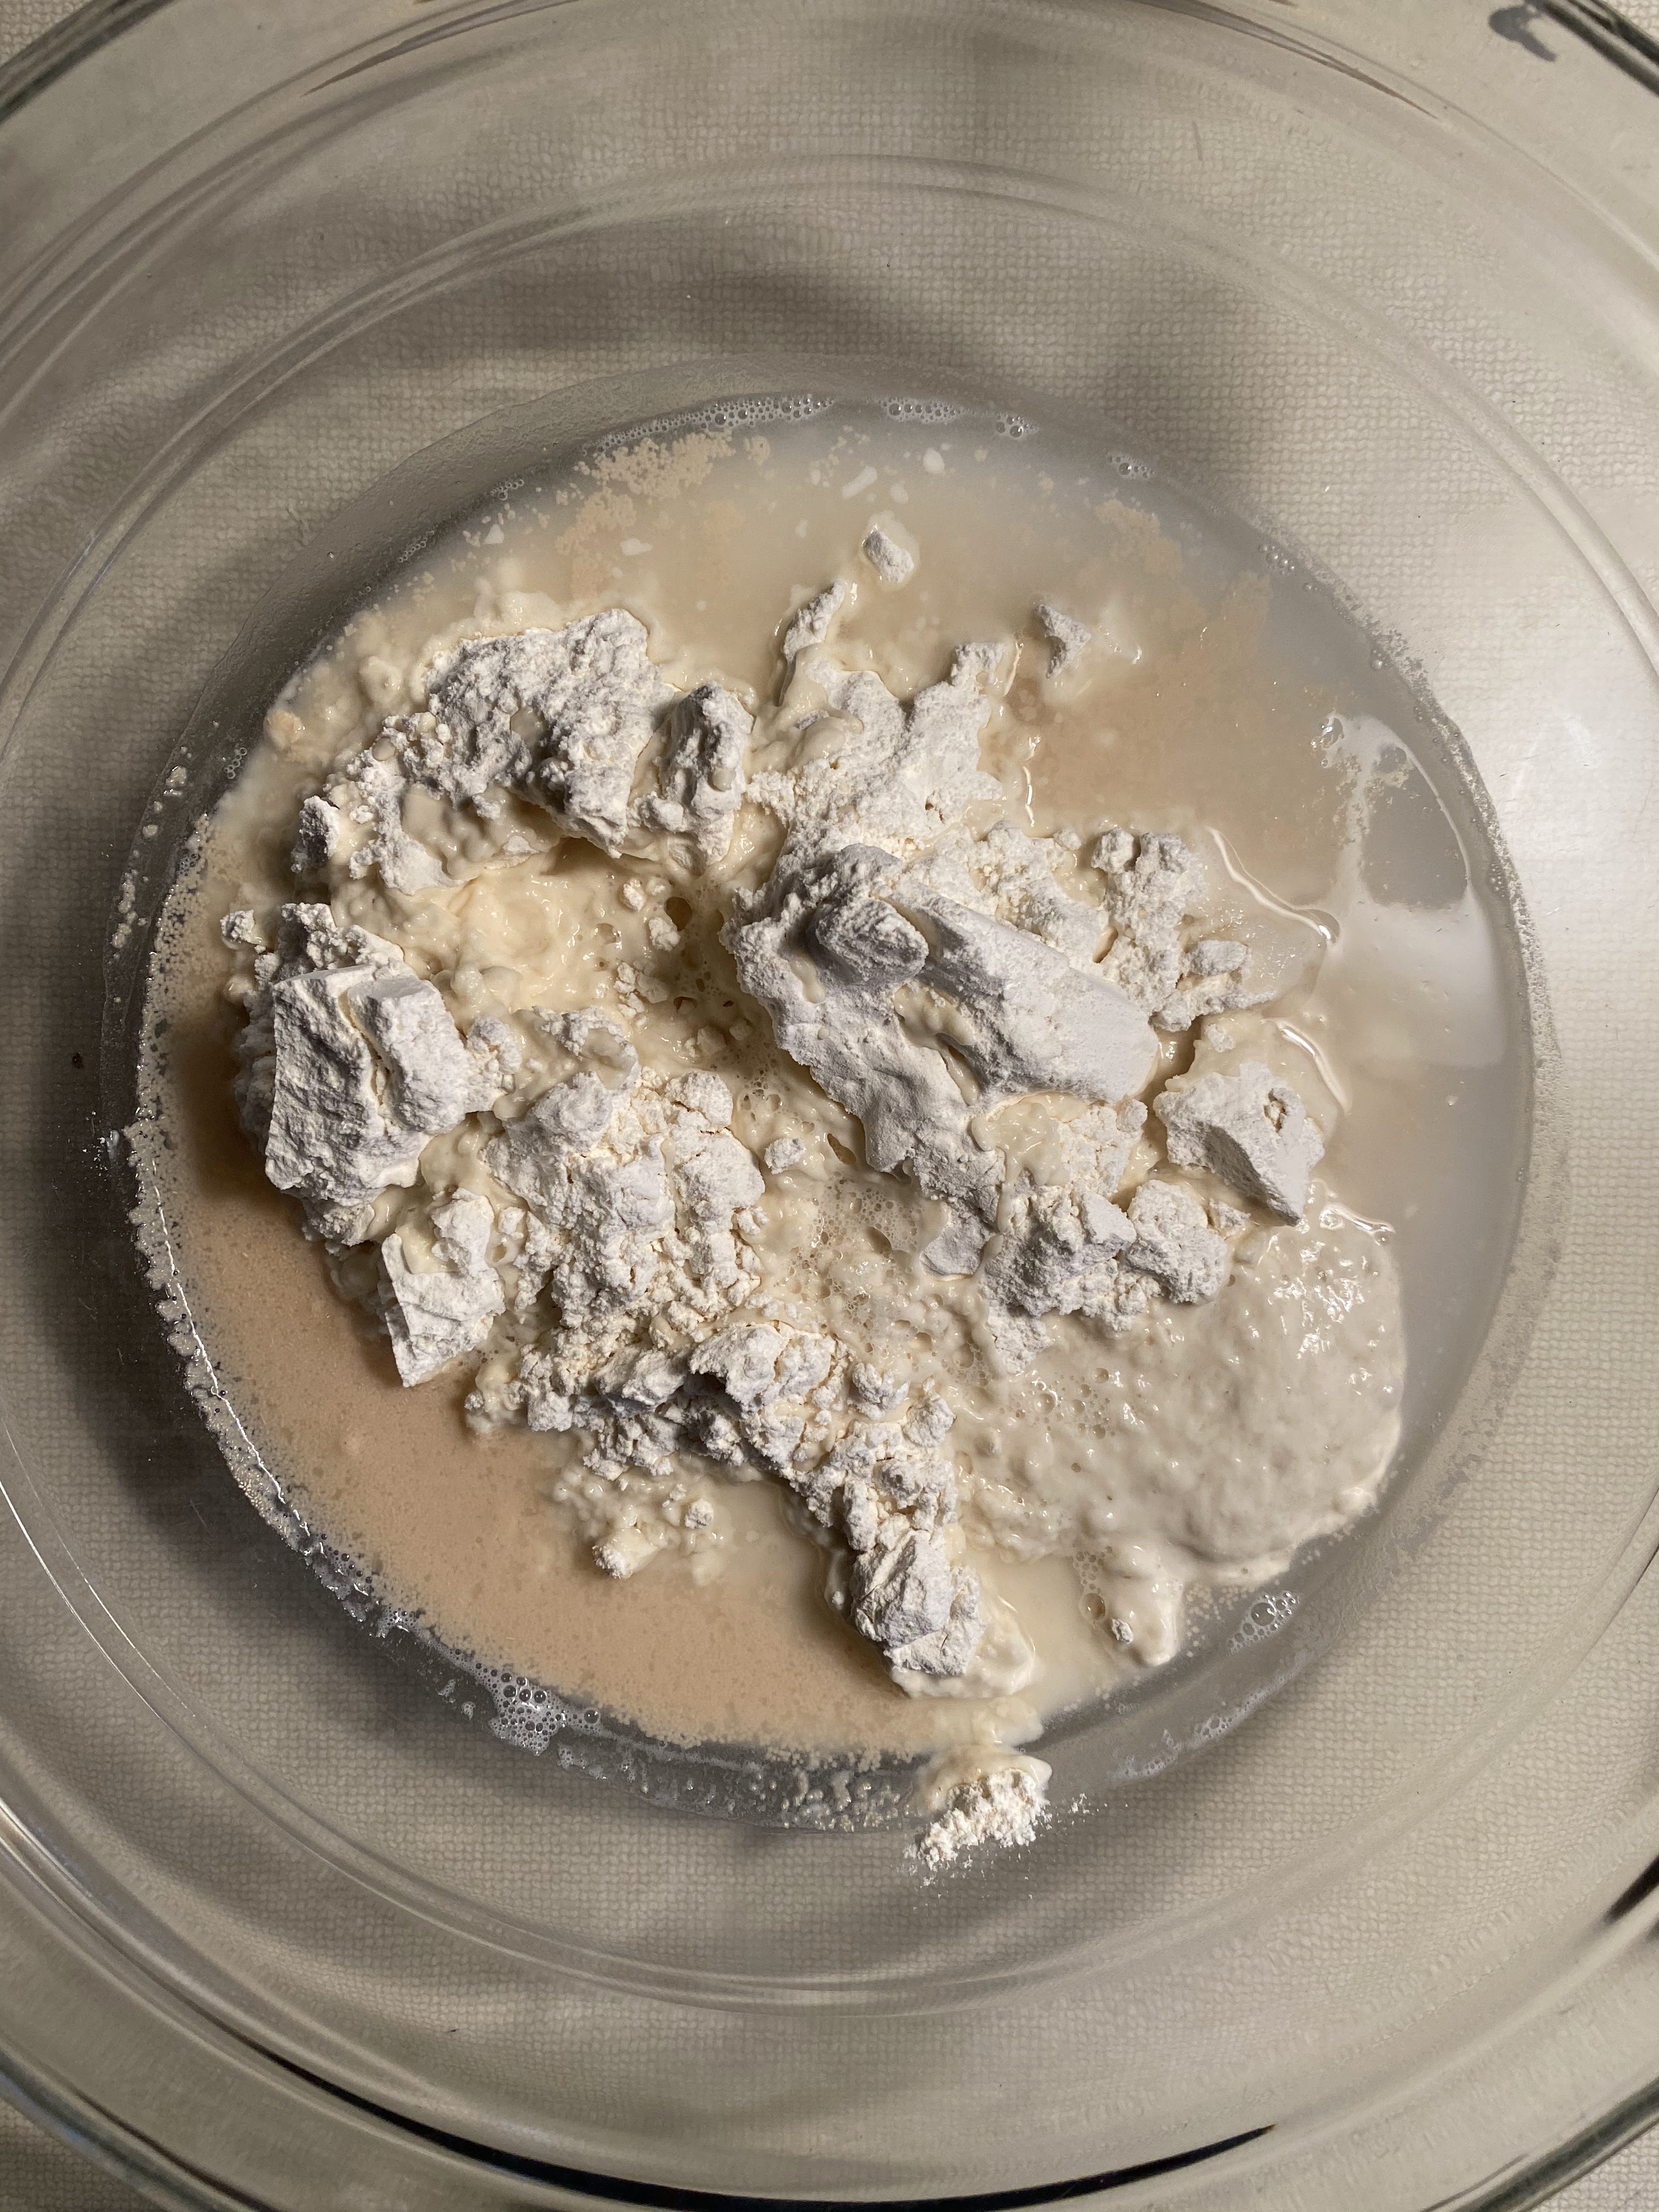
113g water
120g all purpose flour
1/8 tsp instant yeast
Mix the starter ingredients together in a medium-sized bowl, cover, and let rest at room temperature overnight.
Step 2: Make dough
420g all purpose flour
227g water
9g salt
1/4 tsp instant yeast
All of the starter
Measure the dry ingredients in a large bowl.
Add the starter.
Mix with the handle of a wooden spoon until thoroughly combined.
Using a dough scraper, do some in-bowl stretch and folds. You’ll notice the dough begin to get a little smoother as you go around and around the bowl.
Cover and let rise 1 hour.
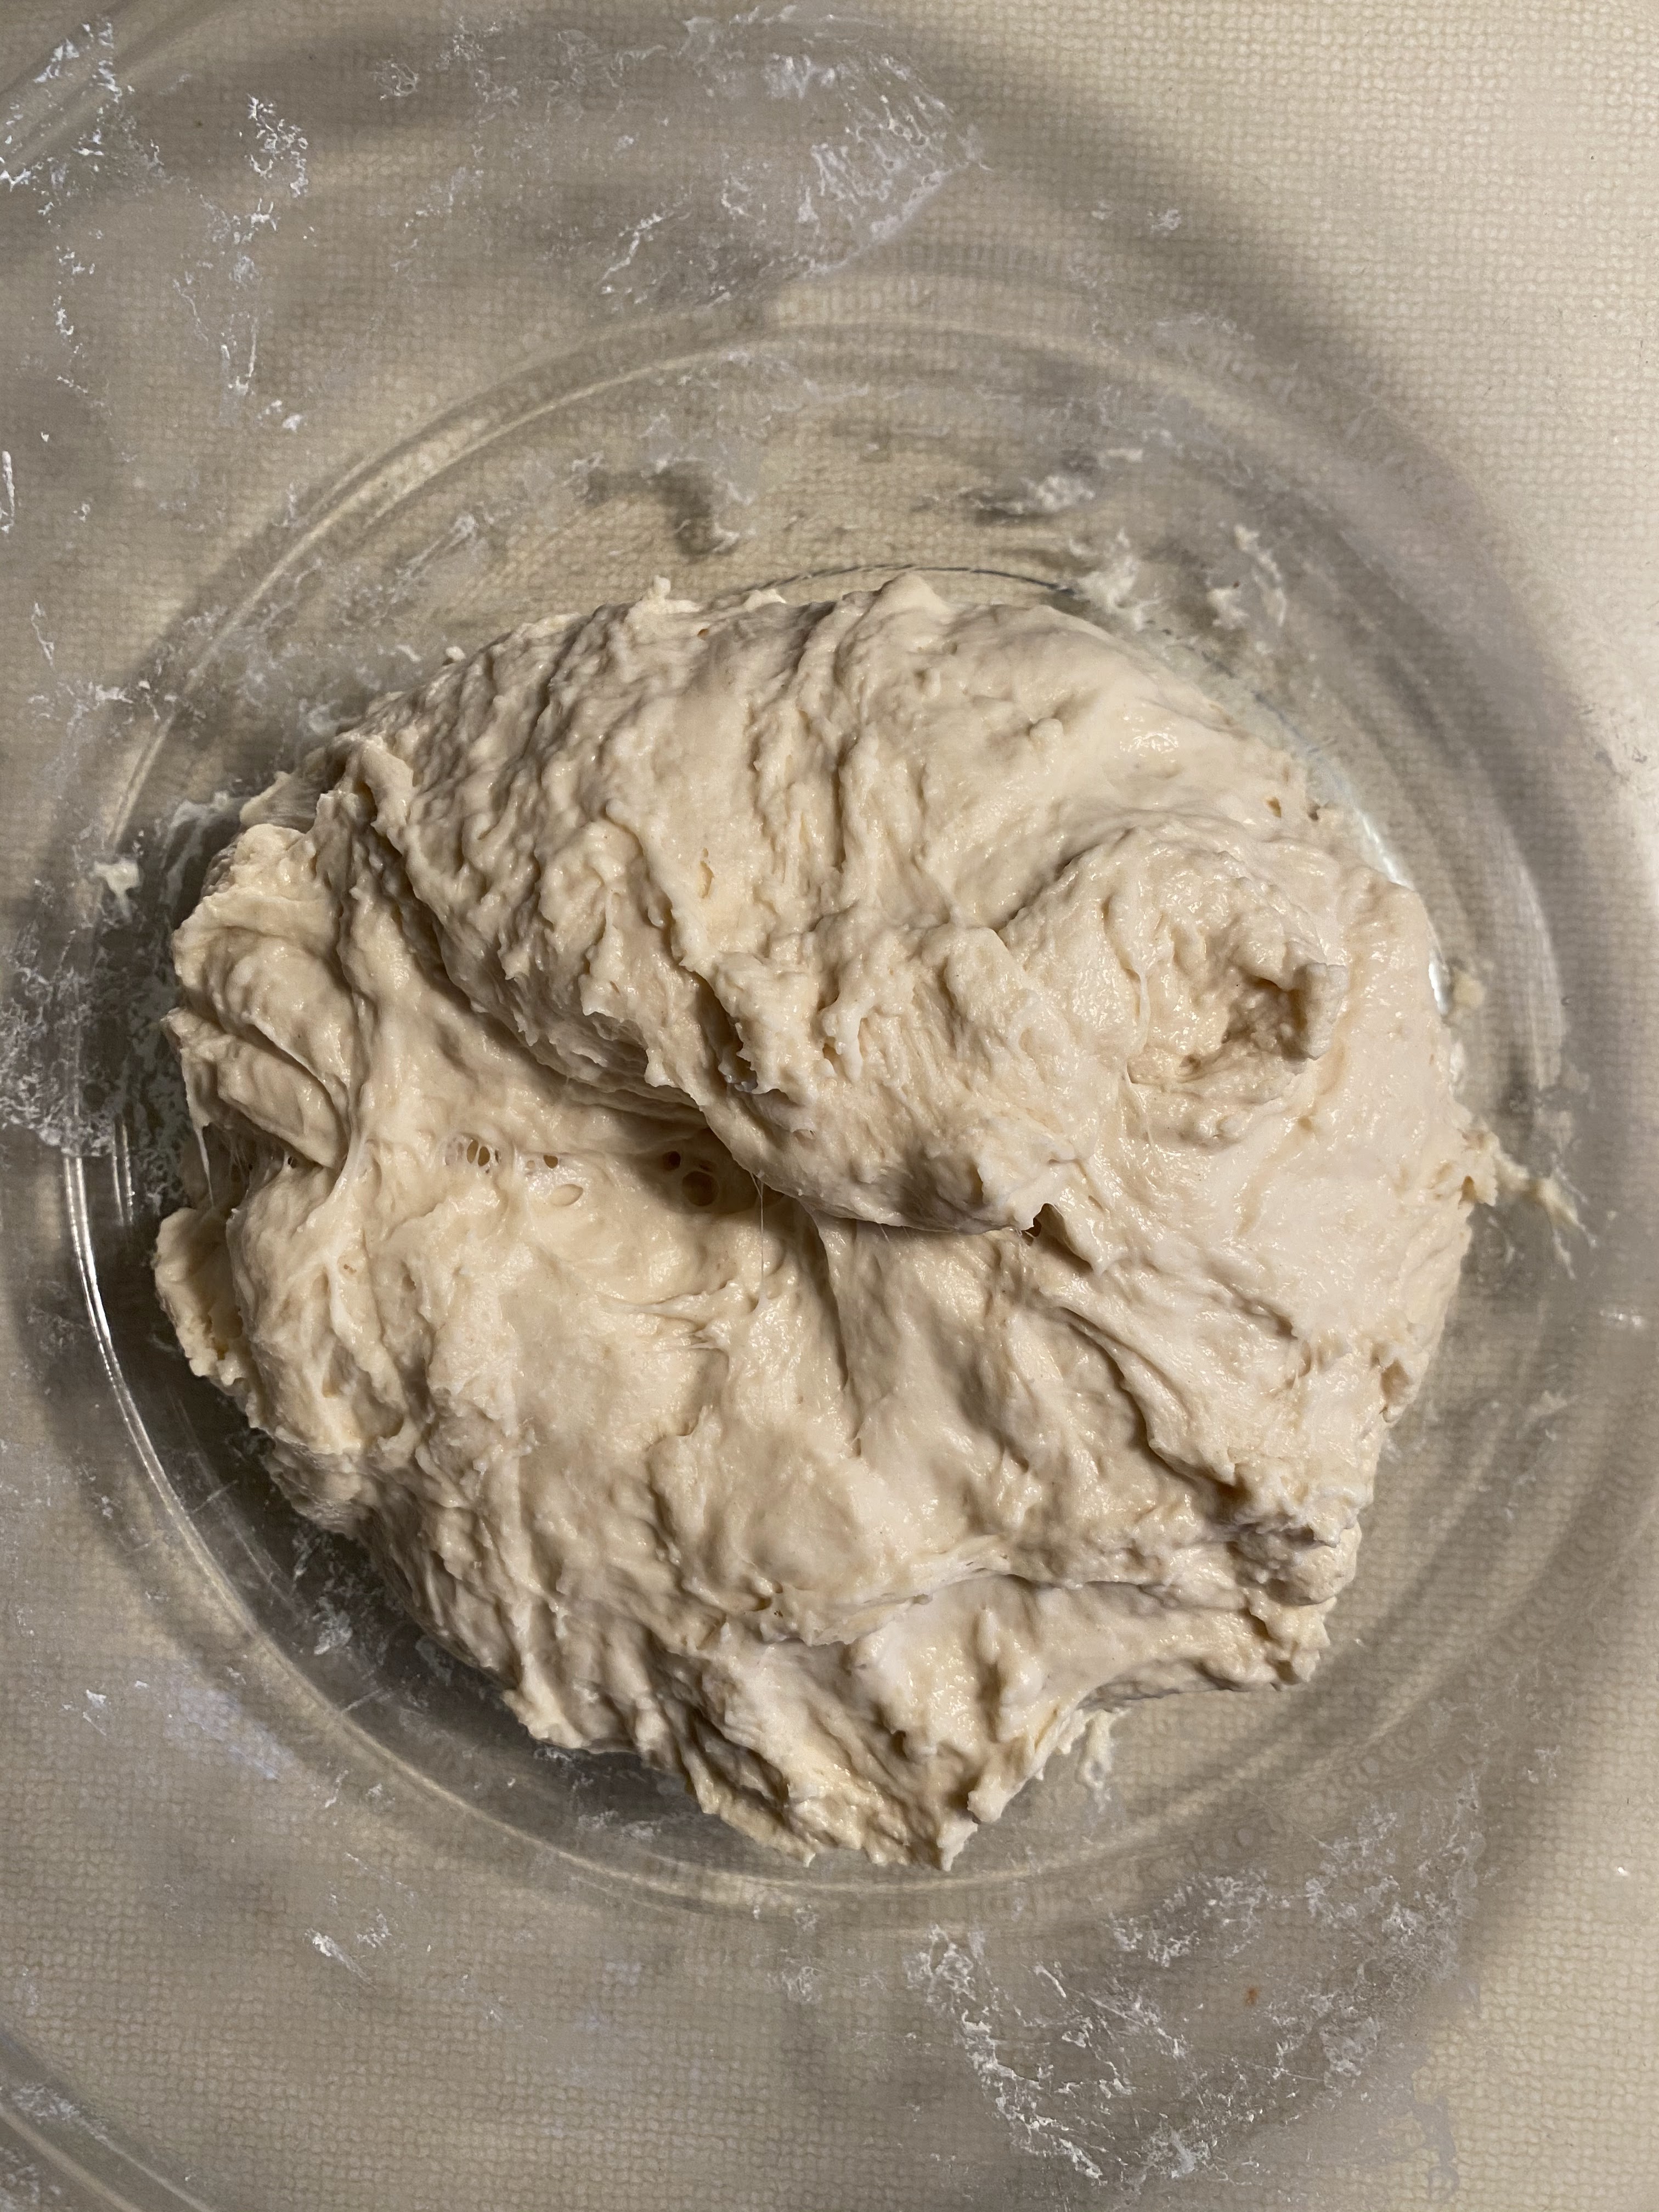
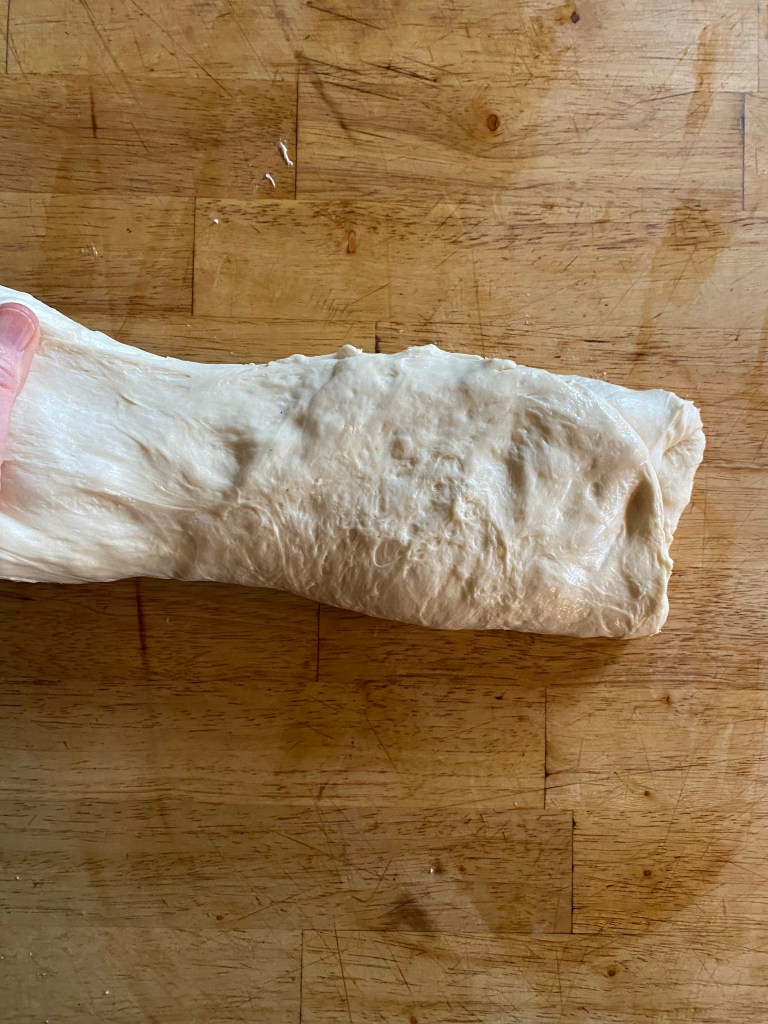
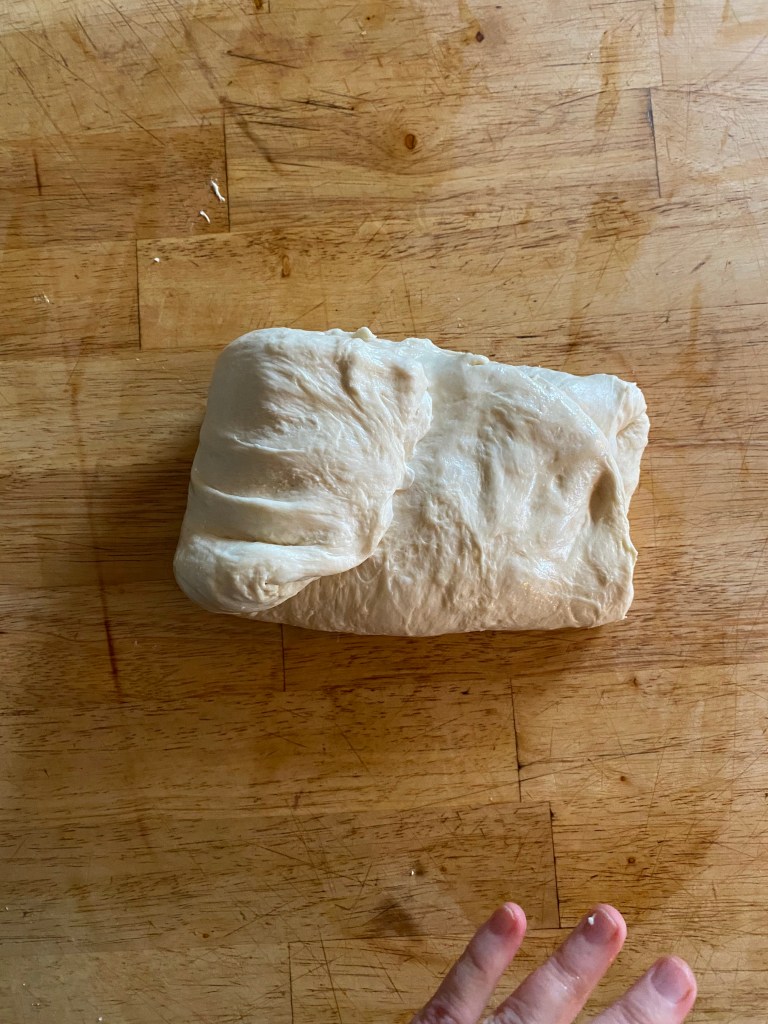
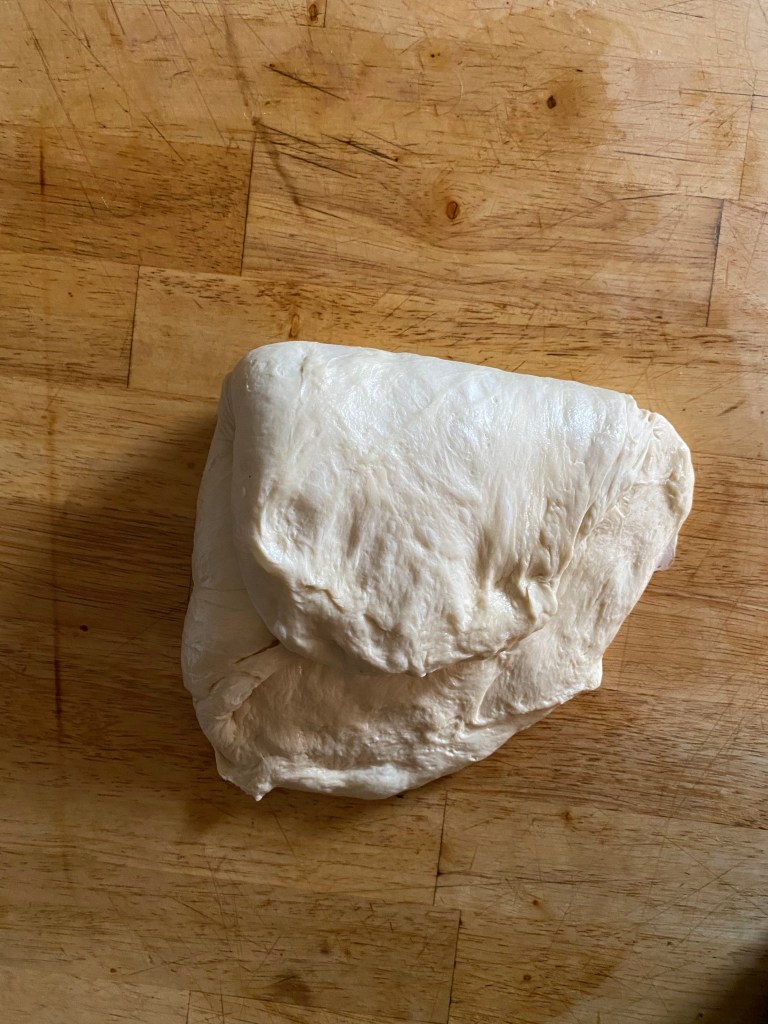
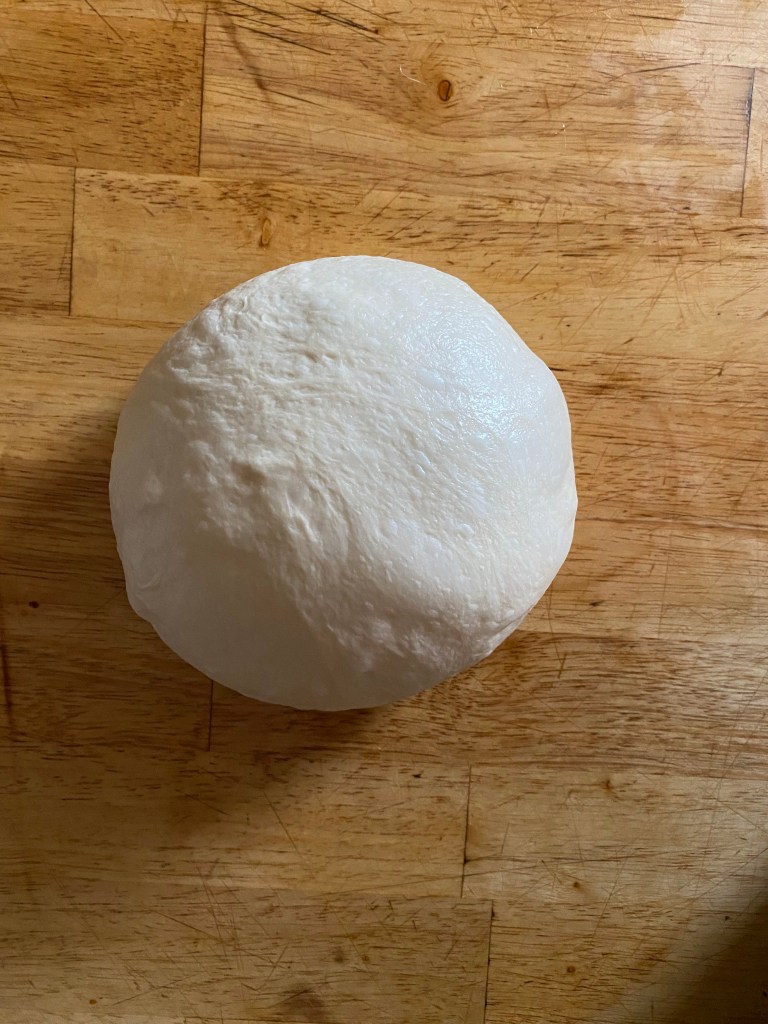
Step 3: Envelope kneading, proofing, and shaping
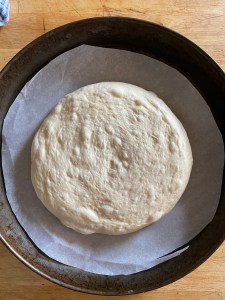
Scrape the dough out onto a to a lightly oiled countertop.
Deflate the dough and press it into a rectangle. Do 2 envelope folds: first stretch out and fold the right end over to the center, then stretch out and fold the left end over that. Then do the same from the top end and the bottom end. Turn it over and place into an oiled bowl.
Cover and let rest 2 hours.
Scrape dough back out onto the oiled countertop.
Deflate it, then pull the sides out and over towards the center to form a circle. Turn it over and shape into a ball, dragging it along a dry part of the countertop to make the top taught.
Press into a flat round.
Cover and let rest for 10 minutes.
Place the disc onto a piece of round parchment, cut to fit into a 14″ pizza pan and pat or roll the dough into a 14″ round. If it keeps springing back, just cover and let it rest for about 10 minutes.
Cover and let rest in the fridge for 8 hours.
Step 4: Bake
1 egg white, beaten with 2 tbsp water
about 1 tbsp white sesame seeds
Remove the dough from the refrigerator
Preheat oven to 350.
After 30 minutes, or when the oven is at 350, uncover the dough and brush the top with egg white and sprinkle with sesame seeds.
Bake for 25 to 30 minutes, until it’s a light golden brown and the internal temperature is 190°F when measured with a digital thermometer.
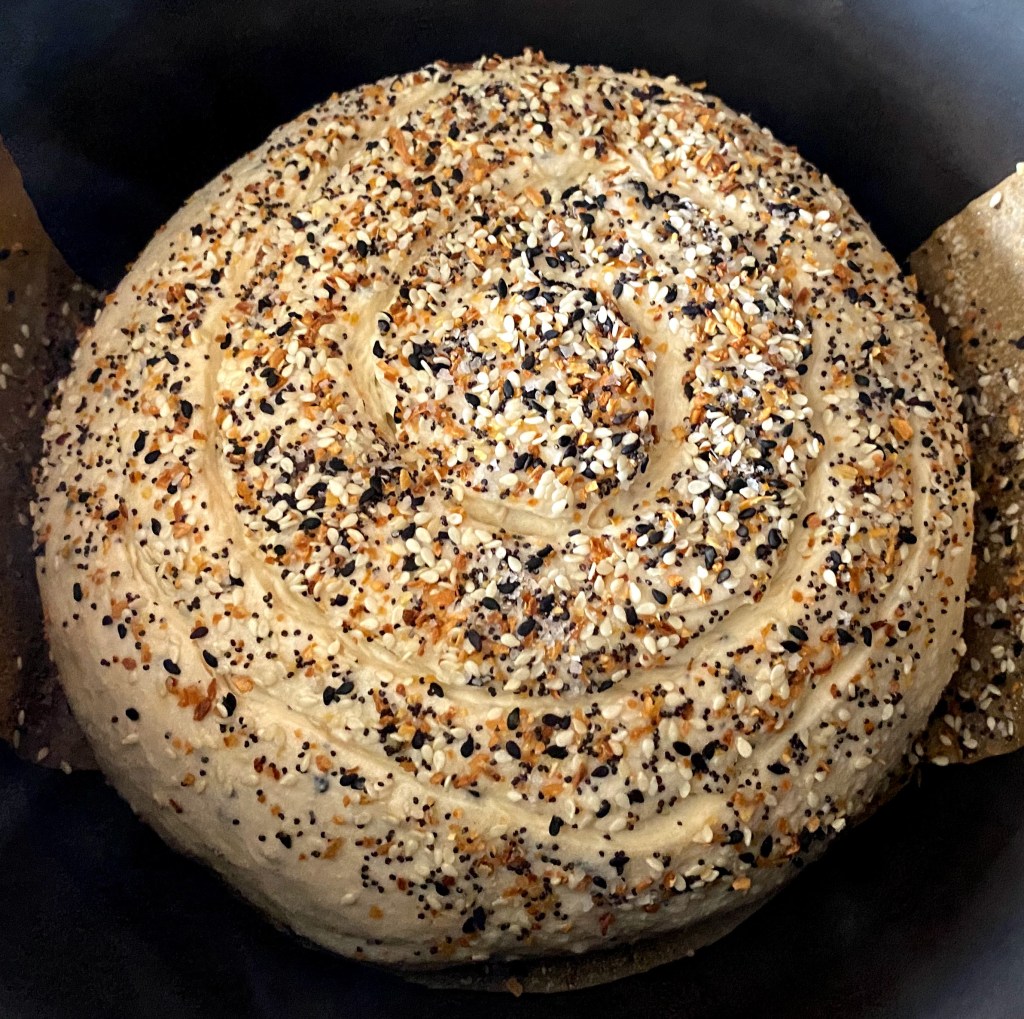
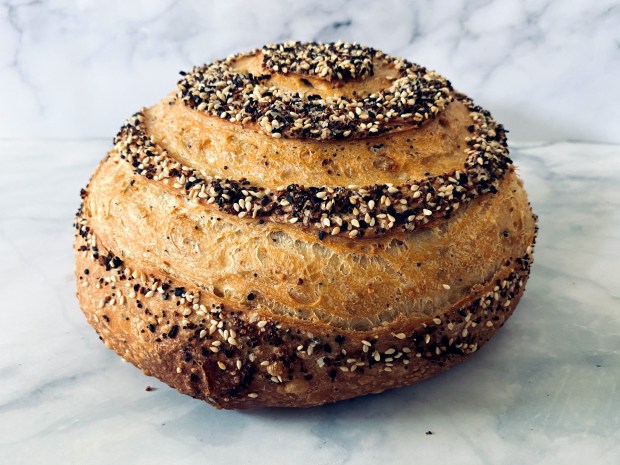
Want the savory punch of a bagel without the time-consuming process of either baking them yourself or going out to get some? Then this bread is for you – delicious, easy and satisfying. It does require an overnight rest, but after that, you don’t need to spend much time on it at all. The Everything Bagel seasoning is mixed into the dough in addition to being sprinkled on top, making it the perfect foil for some avocado toast. This is one of my favorite breads so far!
I found this on Leite’s Cuisine, one of my top ten food blogs. It’s been around since 1999, and has thousands of tested, well-written recipes, from hundreds of professional contributors. All bread recipes are written in both US and Metric measurements, which is super convenient.
Click here for the recipe. Trader Joe’s makes a good seasoning mix, but if you can’t find it, Leite’s Cuisine’s recipe is below:
2 Tbsp poppy seeds
1-1/2 Tbsp black sesame seeds
1-1/2 Tbsp white sesame seeds
4 tsp dried minced onion
4 tsp dried minced garlic
2 tsp flaked sea salt or coarse salt
If you want to try your hand at bagels, we made them during Week 51. Recipe and lots of tips here.
This Swedish sandwich “cake” is a wonderful party dish in the Spring; perfect for Easter or Mother’s Day. It’s made with bread instead of cake, filled with a variety of savory spreads, iced with cream cheese, and decorated with fresh herbs and vegetables. You can make it ahead of time, and then finish off the outside on the day you’re going to serve it. Fillings and toppings are varied, and can be seafood and/or meats, or vegetarian. And, best of all, it’s super easy to make (although a little time consuming).
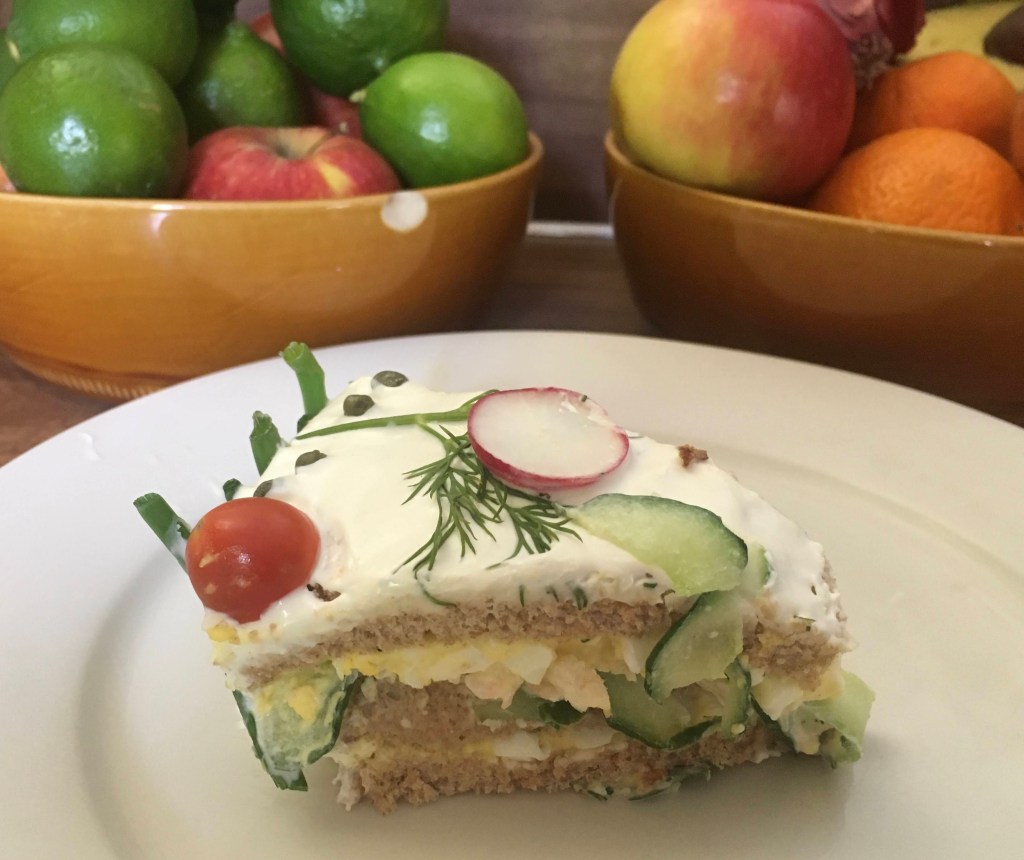
I like to make salmon pate, egg salad, and a creamy shrimp filling for a four-layered cake, but a three-layered cake (above) works just as well. I make the icing by mixing some sour cream with softened cream cheese (one small carton of each is enough for both the fillings and the icing). I decorate with carrot, radish, capers, cherry tomatoes, cucumber, chives, flat leaf parsley, dill and grated lemon and/or lime zest, and this last time I made it, I added kiwi crescents to the top. Some folks put lox and shrimp as decorations as well, but I find it’s hard to cut through those, so I leave them for the inside.
Both the fillings and decorations are totally up to you, and can be guided by what’s in season, or the occasion.
Bread: 1 large round loaf (sliced to make 4 layers), or 16 sandwich bread slices, crusts removed*
.5 oz packet of fresh dill
.5 oz packet of fresh chives
small bunch of flat leaf parsely
1 carrot
1 hot house cucumber
handful of cherry tomatoes
spoonful of capers
1 kiwi
1 large lemon
1 lime
8 oz. soft cream cheese
8 oz. sour cream
14 oz. smoked salmon
8 eggs
2 cups bay shrimp
Bottom layer filler: Rökt laxpate
14 oz. smoked salmon, broken up and smashed
2 Tbsp mayonnaise
1 Tbsp sour cream
1 Tbsp soften butter
salt/pepper
Middle layer filler: Äggsallad
8 hard boiled eggs, chopped
mayonnaise
chopped chives
salt/pepper
Top layer filler: Skagenröra
2 cups bay shrimp, well drained
2 Tbsp mayonnaise
2 Tbsp sour cream
about 1/3 cup chopped fresh dill
grated rind of one lemon
salt/pepper
Bread
Start with a bread layer, then add a layer of bread on top of each filling, ending with a layer of bread on top of the thrid filling. Spread mayonnaise or softened butter on bread before topping with filling. Press down on bread layers after loading up each one. Cover and store in fridge overnight to set.
* I use a spring form pan for a circular “cake” even when I don’t have a round loaf to start with, but it’s kind of a pain. If you don’t want to fool with that, just use four slices of square sandwich bread for each layer to make a square, free-form version.
Get a scale. They are not expensive, but really valuable! Measuring by volume varies widely depending on the person/method. If you look up conversions for volume vs weight, the standard is 120 grams flour per cup. But Cooks Illustrated tested this, and found most people end up putting 150 grams of flour in a cup. Here’s a conversion chart you can use until you get that scale.
A digital thermometer helps too (see “Temperature” below).
Instant yeast and active dry yeast are interchangeable – except it might take longer for the dough to double if you use active dry yeast. (Some sites will say you have to dissolve active dry yeast in water. This is not the case!) Although, many folks don’t want to skip the step of “blooming” the yeast in water, and perhaps a little sugar, because it’s a good way to test if your yeast is still active. On the other hand, rapid rise yeast is different Here’s a great article on the different yeasts.
Salt is necessary – don’t skip it. A “lean” dough has only water and flour. If you don’t use the salt, it will not have much flavor. (Some sites say salt kills the yeast. This would only happen if you have an excessive amount of salt; the way yeast is manufactured now, it’s not the case).
All-purpose flour can almost always be substituted for bread/strong flour. Vital wheat gluten is a handy little addition to doughs that are mostly whole wheat or rye, to encourage a better rise. And, if you can’t find high protien flour flour (good for bagels), use this chart to calculate how much vital wheat gluten you should add according to the protien weight of your bread flour.
(Since we’re still waiting on our starter, here’s a bread for Easter weekend!) ENGLAND: These yeasty, heavenly spiced buns are typically eaten on Good Friday, celebrating the end of Lent. There are a multitude of references to the cross representing the crucifixion of Christ, and suggestions that the spices signify those used to embalm, but as food historian Ivan Day says, “The trouble with any folk food, any traditional food, is that no-one tended to write about them in the very early period.” Which is to say, most of this is conjecture, and it is just as likely that the cross is a way to separate the bun into sections. Back in the day, folks would grate, then save the bread that was baked on Good Friday to use as a medicine in later years, and some believed that the buns would never go moldy, so they nailed up in the house as a good luck charm.
I found many versions of hot cross buns (12M results on Google!) and tested three. I am happy to report that Bake with Jack’s Hot Cross Buns is the clear winner — and he just today posted an accompanying video with tips and updates, since that recipe was originally posted on his blog in 2017.
Yeast measurement is 14g total (seems like a lot, I know)
Caster sugar is very fine granualted sugar. Go ahead and use granualted sugar (not light brown sugar which would be too wet).
I used 2 medium lemons and 1 large orange which equaled about 1 Tbsp zest for each.
I got 3/4 cup juice from the lemons and orange, so added 3/4 cup granulated sugar to that for the syrup. I simmered it for 15 minutes. It gets thick as it cools.
Mixed spice is very similar to our pumpkin pie spice, and that would make a fine substitute. But the mixed spice is a little more complex, so I’ve listed the ingredients below if you’d like to make your own.
1 Tbsp ground allspice
1 Tbsp ground cinnamon
1 Tbsp ground nutmeg
2 tsp ground mace
1 tsp ground cloves
1 tsp ground coriander
1 tsp ground ginger
I had a hard time piping the flour/water paste in even thickness/straight lines. I did one strand all the way around, and then ended up using a wet table knife to cut the individual strands before moving on to the next bun.
Gas mark 180°C is 400°F
Video below has tips that would be useful in making this recipe.
Links to some of his videos that would be useful for this recipe
P.S. I really wanted to like Dan Lepard’s Spiced Stout Buns recipe — link here — because they seemed like a grown-up version, and feature the no-knead method. But the special ingredients, the length of time with it’s overnight ferment, and tricky method if you’re a beginner, just didn’t seem worth it in the end. They are tasty though, and it’s a no-knead method, so have at if you’re interested!
While you wait for your sourdough starter to be ready, you can satisfy your sweet tooth without the guilt! Inspired by Rogue Ale’s Cherry Choctabulous, with a hint of cardomon and coffee, this bread is as good with a cold glass of milk as it is with a glass of red wine. Recipe makes one loaf, and there’s also instruction for individual Chocolate-Cherry Bombes.
Unless you live in New York (or Montreal, strangely enough), you’re surrounded by people who complain that they can’t get a decent bagel anywhere.* But, it doesn’t matter where you live, because a perfectly satisfying version can made at home! Follow a method that incorporates a.) proofing the dough overnight, b.) boiling them before baking (duh), and c.) using a high protein flour and barley malt, and the end result will be bagels with a shiny, thin, crispy crust and a dense, chewy , slightly tangy interior. The most successful batch I made comes from Zingerman’s Bakehouse, with a few adjustments on my part: I boosted the protien content of the flour, added an overnight proof, and used malt powder rather than syrup.
Bagels originated in Poland, (first written mention of them is in 1610), and were brought to America by Eastern-European and Jewish immigrants in the late 19th century, becoming mainstream in the ’70s. There’s a few theories on the origin of the name, some say it comes from the Yiddish beigen, which means “to bend”, others say it’s from the Hebrew word b’igul meaning “in a circle”.
Below are answers I found to some bagel questions I had while doing research for this week’s bread:
Why the water bath before baking?The starch in the dough gels when the bagels are put in the boiling water, which prevents the water from seeping into the bread. This sets the crust before baking, and prevents them from rising too much — thus the dense and chewy crumb.
Why the baking soda and/or malt extract?The baking soda aids in browning the crust, and the barley malt adds an authentic flavor., and encourages browning as well. You can use either Barley Malt Syrup or Diastatic Malt Powder, which is made from sprouted barley that’s been dried and ground. What you’re after is the active enzyme, amylase.
What’s the best flour to use?Bagels made in professional bakeries use flour with a very high protein/gluten (14.5%) content. You can buy it (King Arthur has a good one), use bread flour (12%), which is a close second, and all purpose (10%) will work in a pinch. Another option is to mix bread flour with vital wheat gluten. I chose this route because I’d rather buy a small bag of vital wheat gluten than a big bag of high protein flour that I might not use very much. The recipe below is for either bread flour, OR bread flour mixed with vital wheat gluten.
What came first? The poles or the holes?The hole!Because the dough is so dense, it’s hard to cook them all the way through.So, the poles came later, as a good way to store these round breads with a hole.
Tips
Most recipes are for a dozen bagels. They really are best eaten day of, so I have listed ingredients for just 6. It is also more efficient to be able to boil the six and get them in the oven straight away, so they don’t sit around wating for the other 6 to get boiled. The boiling, timing each side, coating, getting them in the oven quickly is kind of a pain.
It is advisable to knead bagel dough by hand because it has a low hydration level, and not too difficult if you’ve been shying away from kneading without a mixer. You’re not dealing with a sticky mess, so it’s not too tricky. In fact, some sites adivise that it is necessary otherwide you might burn out your mixer! It takes some time, though, so be patient.
Many recipes call for using a baking stone, but don’t let that deter you. A baking sheet worked just fine for me.
Everything bagel topping: 2 Tbsp. each dehydrated onion, sesame seeds, poppy seeds, dehydrated garlic, plus 1 Tbsp. coarse salt
Watch the two videos before you begin, but use the ingredients and written method below.
DAY ONE
STEP 1: Make the sponge
227g bread flour
OR 218g bread flour + 8g vital wheat gluten
1/4 tsp yeast
128g warm water (110 degrees)
Measure the flour, yeast, and vital wheat gluten (if applicable) in a mixing bowl.
Whisk to combine, then add the water. Mix well, scraping the sides of the bowl and make sure there’s not dry bits.
Cover with plastic wrap, and let rise on counter for 2 hours.
Refrigerate for 4 hours.
Remove from fridge, and let come to room temperature (about 30 minutes). Take it’s temperature; it’s much easier to work the dough when it’s warmed up!
STEP 2: Make the dough
Sponge from the day before, at room temperature
227g bread flour
OR 218g bread flour + 8g vital wheat gluten
1/4 teaspoon yeast
11g salt
2 tsp diastatic malt powder
Add the yeast to the sponge and stir.
Then add the flour, vital wheat gluten (if applicable), salt and malt powder, and mix with a dough scraper, or one hand, to try to incorporate as much of the flour as you can. You won’t be able to mix it to a dough at this stage
Dump it all on the counter, and knead – about 8 – 10 minutes, until you get a nice dough. Watch the video for his method. You want it to be stretchy (not rip if you pull it), but firm. Another test would be to take it’s temperature, it should be between 77-81 degrees. If you can’t seem to get it to this point, leave it for 10 minutes, and then try again.
Place in a large (it’ll rise), clean bowl, cover and refrigerate overnight.
DAY TWO
STEP 1: Shape Bagels
Let dough come to room temperature
Divide the dough into six pieces.
Form pieces into rounds by first creating a taut undersurface, then turning over, and pressing and rolling with cupped palm against surface in circular motion. (The video above does not do it this way, but the one below does.)
Cover with a damp towel, and letthe dough rounds rest for 20 minutes
Lightly dust a tray, or some of your counterspace with flour so you’ve got place to put them once they’re shaped
Shape into a log and wrap around your hand to join, OR just poke a hole in them. I put corks in the middle because I was afraid they’d close up.
STEP 2: Rest, boil and bake
1 Tbsp baking soda
semolina flour, or corn meal
Preheat oven to 500 degrees.
Let rise about an hour, but this depends on the temperature of the room. You don’t want them to rise too much, otherwise, they’ll collapse a bit after baking. If you press on them with a fingertip and the indentation springs back, but not all the way, then they are done. If it doesn’t spring back, proof some more, if it springs back all the way, they might be over-proofed. It’s okay, you can still back them, but they might end up a little flat.
Preheat oven to 500 degrees.
Bring a large pot filled with at least 4” of water and 1 Tbsp of baking soda to a boil.
Meanwhile, prep your area for boiling and baking
Dust a baking sheet with semolina flour, or corn meal
Put your toppings next to this sheet, in containers that will hold one bagel
Set your timer for 1 minute – but don’t start it yet!
Prep a baking tray with semolina flour for placing bagels that have been topped
Carefully add bagels and bathe them for 45 seconds per side (30 for less chewy, 60 for more).
Remove, place in a topping, then put face up on the set aside baking sheet.
Repeat with the rest.
Turn oven down to 475 and bake for 14 ~ 16 minutes.
Cool on wire rack at least 30 minutes before slicing.
Toppings: Sesame Seeds, Everything Bagel, Poppy Seeds and Aji Nori Furikake (seaweed sprinkles)
ITALY: These oven-baked wider-than-grissinis (Italian breadsticks) are inspired by the traditional long and thin Italian sfilatino which is similar to a French baguette. These were so much fun to make; there’s no kneading involved because the dough is so wet. It won’t seem like you can actualy shape the sticks from this wet, airy dough, and lift them onto the baking sheet, but follow along with the video instructions and you’ll see that it does, in fact, work.
This is from The Great British Baking Show Master Class: Season 2, Episode 1, beginning at around 24:21. The ingredients listed below are half of the recipe that’s demonstrated in the video. These don’t really keep well (they lose their crunch pretty much overnight), so it’s best to make as many as you’d consume in a day.
Mix these first, then add the olive oil and olives
Watch the video demonstration all the way through. It’s pretty basic, but it’s good to know ahead of time what comes next.
Water: He measures out 800 ml, so half that would be 400 ml, which is way too much. The written recipe on the BBC site is 400 ml, so half that would be just 200ml. In other words, use 200 ml. Even 250 was too much; I had to start over.
Paul’s “good glug” of olive oil = 1 Tbsp
Add the olives, a few at a time. The video shows them getting all dumped in at once, but mine did not distribute well, so I suggest adding a handful at a time.
You do want to use a rectangular container for the proffing because that’s the shape you want the dough to be for cutting. It’s so wet, you don’t shape/knead it when it’s done proofing, you just cut it in the shape that it lands on the counter.
Their 220 fan is equivalent to 475.
Use a lot of flour to dust, and pay close attention to the video where he shows how to cut the breadsticks, and roll them away.
It seems like they’d be impossible to pick up, but you can. You don’t really need to stretch them, they stretch as you lift them from the counter to the tray.
I didn’t space mine very far apart, but I didn’t want them to touch. So, I had to put 3 on a separate tray.
A healthier version of Week 3: Boule, with an overnight fermentation for added flavor. I like making two small rounds because it’s easier to slice individual pieces, and it’s handy to have one in the freezer, or an extra to give away. This bread is really good toasted, then topped with goat cheese and a drizzle of honey.