
The word “Sourdough” is in quotes because the name is a total misnomer. This is a wild yeast starter, and not all breads made with this non-commerical yeast are always sour. Using this type of starter (also known as a levain) doesn’t equate to making a sourdough loaf, and it’s often used to make all sorts of baked goods, such as pancakes, brownies, etc.
When you let a mixture of flour and water sit, the wild yeast that naturally occurs in flour (it’s actually everywhere) starts to grow by eating, i.e. metabolizing, the starches/sugar, producing lactic acid. This gives it a tangy taste. Bacteria then feeds off the yeast’s waste, producing acidic acid, which is what makes it sour. While all this is happening, it’s considered live, and the mixture gets bubbley and rises. Once everything’s consumed, it falls and is dormant until the next feeding. So that you don’t end up with a massive amount of starter, you throw some away just before each feeding, and then add some fresh water and flour to the remainder, thereby keeping a consistent amount.
You can actually purchase starters on line, if you want guaranteed success. And the 1847 Oregon Trail Sourdough Preservation Society will send you one for free. Yes, it’s been around for that long!
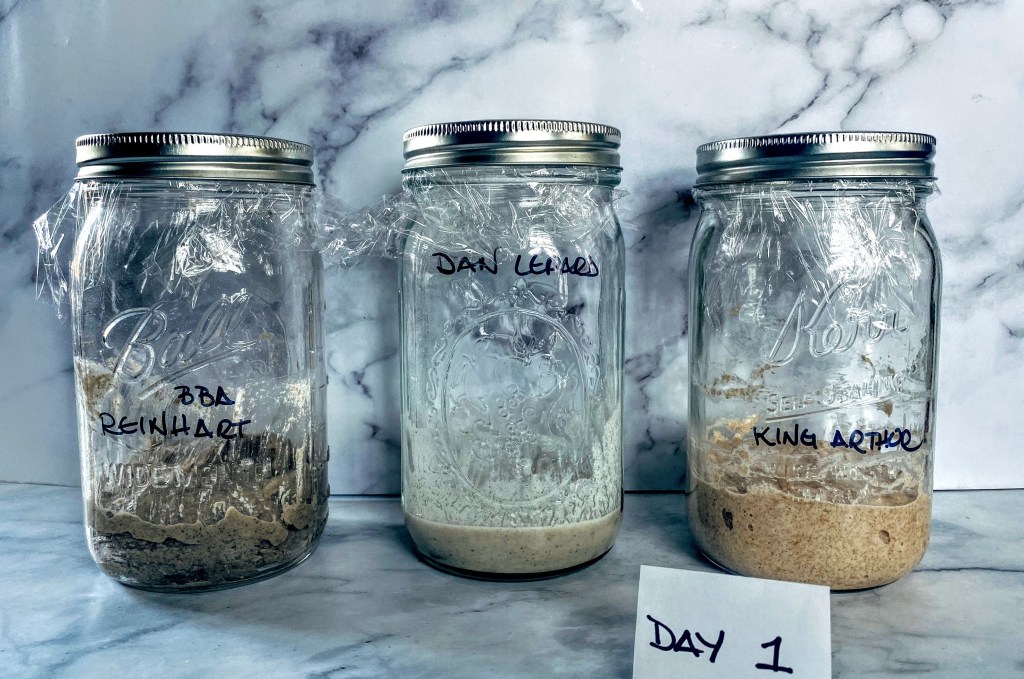
I tested methods from three reliable sources, chosen because they offered different methods and different ingredients.
- King Arthur Baking Company: starts off with wheat flour; feeds are all-purpose flour, very straightforward
- Dan Lepard (The Handmade Loaf): starts off with yogurt, raisins and rye; feeds are bread flour, very interesting
- Peter Reinhardt (Bread Bakers Apprentice): starts off with pineapple juice, rye or whole wheat; feeds are bread flour, most complicated, but also had the most helpful information
My conclusion? That it can be a pain in the neck to start, then tend to a starter, and the varitals above barely made a difference in the loaves that I baked.
My recommendation? Keep the process simple. (However, If you want to go all in, and have a complete understanding of the process, I highly recommend the very comprehensive Make Your Own Sourdough Starter document from Northwest Sourdough.)
To begin with, let’s all just assume we’re using a clean jar and that it’s just fine to use tap water. You don’t have to be super accurate in marking the jar to see if it rises double. You’ll know when it’s active/live because there will be lots of bubbles and it will rise a lot. Your measurements don’t have to be exact to the 10th degree, you just want the same amount of starter as water and flour. Your timing doesn’t have to be exactly to the minute, and if you forget and skip a day, it’s no big deal.
The following is how to make a liquid starter, as opposed to a stiff starter. This starter can be used directly from the jar, i.e. combined with your flours (and water/salt) to make a dough. Or, you can use it to make a hybrid starter (see #2 below).

Your starter supply kit. Some sites recommend coveirng with cheesecloth instead of plastic wrap, but I didn’t like the dried out hard bits that formed on the top. Plastic wrap can stretch up if need be. Cheesecloth allows open air, and therefor “good” bacteria contact with the flour mixture while keeping out the dust particles.
Day 1: Combine 100g whole wheat flour with 100g water. Mix well, cover, and let sit 24 hours
Day 2: Stir the starter. Let sit 24 hrs.
Day 3 and beyond: Begin the feedings. The formula is equal amounts flour/starter/water. 100g starter + 100g flour + 100g water.
- Stir the starter.
- Put 100g of the starter in a new jar.
- Add 100g flour + 100g water.
- Mix well, cover and let sit 24 hours.
You can use any type of flour you want:
- All white (bread or all-purpose)
- Rye and/or whole wheat mixed with white (I use 30g rye + 70g white). Whole grains provide more nutrients, and better frementation. Rye is not as glutenous as whole wheat, so easier to mix.
You should start seeing some activity now, but if not, just stick to the schedule and keep going. Some sites recommend starting to feed very 12 hours, to give it a boost, but you don’t need to do that. Just being patient, continue on with this schedule, and you will get a rise soon enough! Temperature does make a difference; it’ll work in a cooler environment, but does get active sooner in a warm enviroment. Keeping it at a consistent temperature helps.

9:00 AM 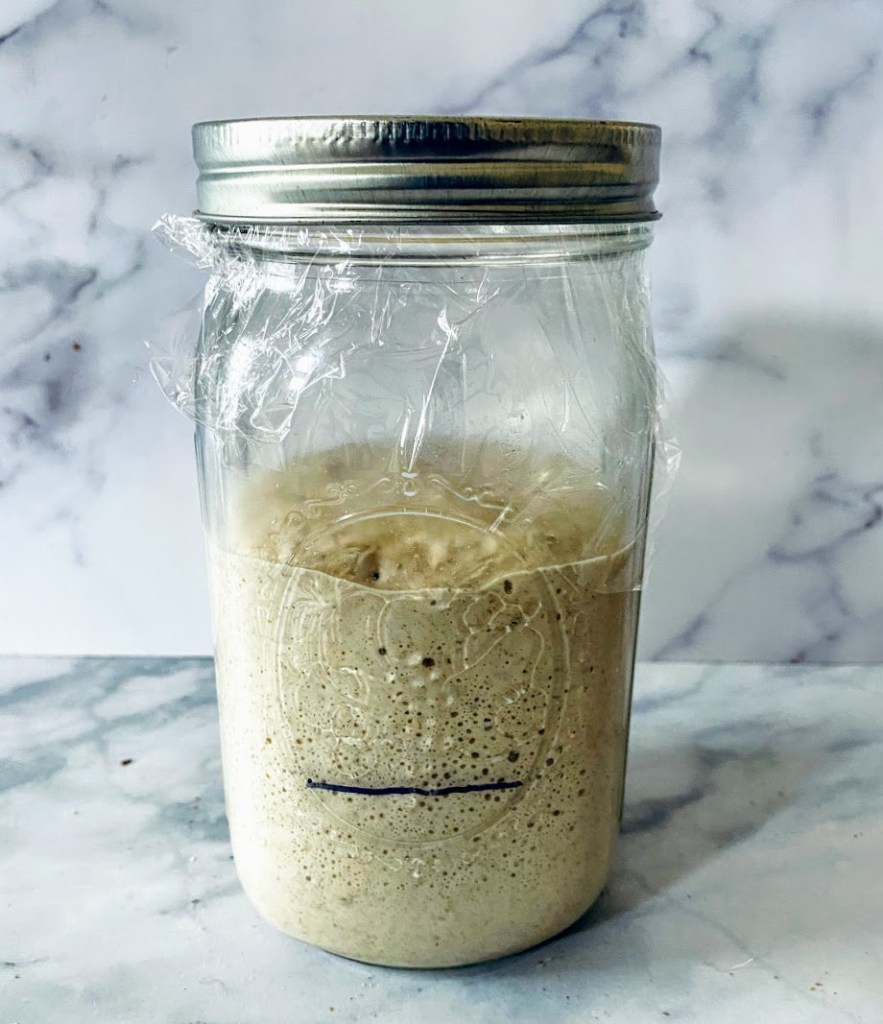
12:00PM | ACTIVE 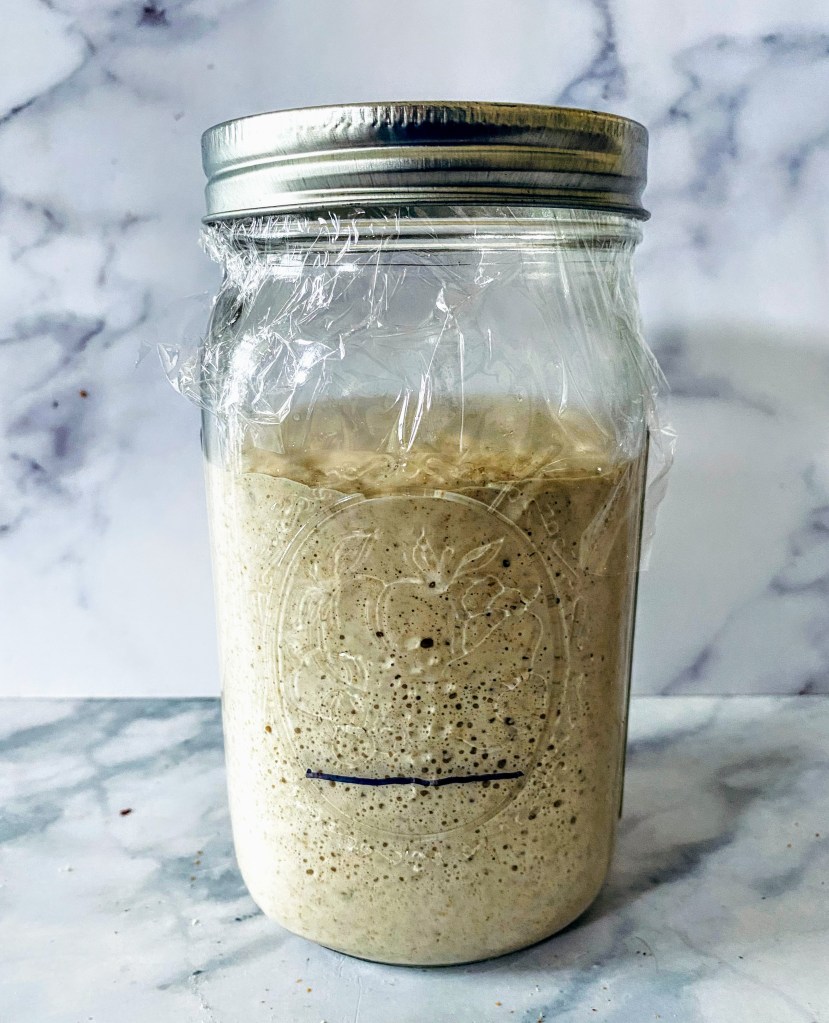
2:00PM | RIPE
Additional info:
- You usually don’t need more than 100g to create a levain for a recipe, so this 300g starter is enough.
- The starter needs to be “mature” when you use it, i.e. has risen but not starting to fall again. You need to know this so that you time your feedings accordingly. If your feeding schedule is the middle of the day, you can’t start baking until after dinner.
- Some recipes use a hybrid starter, i.e. beginning by making a new, separate levain by mixing some starter with flour and water, then adding that to the flours once it matures.

Your starter should always be in view, so you can see when it’s ready and not miss your chance to use it!
- Keeping your starter:
- If you are going to use your starter on a weekly basis, you can keep it on the counter, and feed it weekly in cool weather, daily in warm weather, and twice a day if it’s very warm.
- If you are not baking weekly, and want to avoid that daily/weekly feeding hassle, you can refrigerate it and feed it monthly. Yes, that’s all you need to do.
- You can also freeze it if you’re going to be unavailable to feed it monthly.
*If you are trying to achieve a noticeably sour taste, check out this post: 18 Ways to Make Sourdough Bread More (or Less) Sour.
