
ITALY: Looks like a baguettte, but tastes like a ciabatta – what could be more perfect? This Italian “French bread” has a creamy chewy interior, a dark exterior, and gets its flavor boost from two overnight fermentations, and an addition of milk and olive oil in the dough.
I could only find a few verisons of this bread, and they varied widely. I tested three (all from cookbooks: The Italian Baker, Bread Illustrated, and Bien Cuit: The Art of Bread), then concluded that although they each had some great points, they also came with some tricky and/or non-authentic steps. So, I did a fourth test using what I’d learned from the first three and came up with this method below, which worked out really well.
I found Kingdom Bread’s instructional video to be really useful, and recommend watching it to get an idea of what the process will be (linked below as well). You’ll need a tea towel, and a spray bottle before you get started.
STEP 1: Make the biga (pre-ferment)
- 300g white flour
- 1/8 tsp yeast
- 300g water
- Mix biga ingredients in medium bowl until thoroughly incorporated. I use two chopsticks, then scrape the sides of the bowl down with a dough scraper.
- Cover and let rest overnight for 10-13 hours.
STEP 2: Make dough (next day)
- 450g white flour
- 50g whole wheat flour
- 2-1/2 tsp salt
- 1/4 tsp (heaping) yeast
- 235g whole milk
- 70g extra-virgin olive oil
- Measure the flour, salt, and yeast into the bowl of a stand mixer.
- Pour some of the milk around the sides of the biga, then scrape the sides inward to help release it from the bowl.
- Turn the biga out into the stand mixer, using a dough scraper it it doesn’t slide out easily.
- Add the olive oil and the rest of the milk.
- Mix, with dough hook attachment, for 4 minutes on speed #1, and then for 5~6 minutes on speed #2.
STEP 3: Rock & Roll kneading
- Lightly oil work surface and hands.
- Slide dough of the dough hook, and then empty dough out onto the lightly oiled work surface
- Gently press dough into a rectangular shape, then do 10 “roll and folds” (video instruction below). It might seem tricky at first, but keep going. You will eventually get there!
- Tuck in sides with your hands, then place in an oiled bowl, seam side down.
- Cover and let rest 1 hour
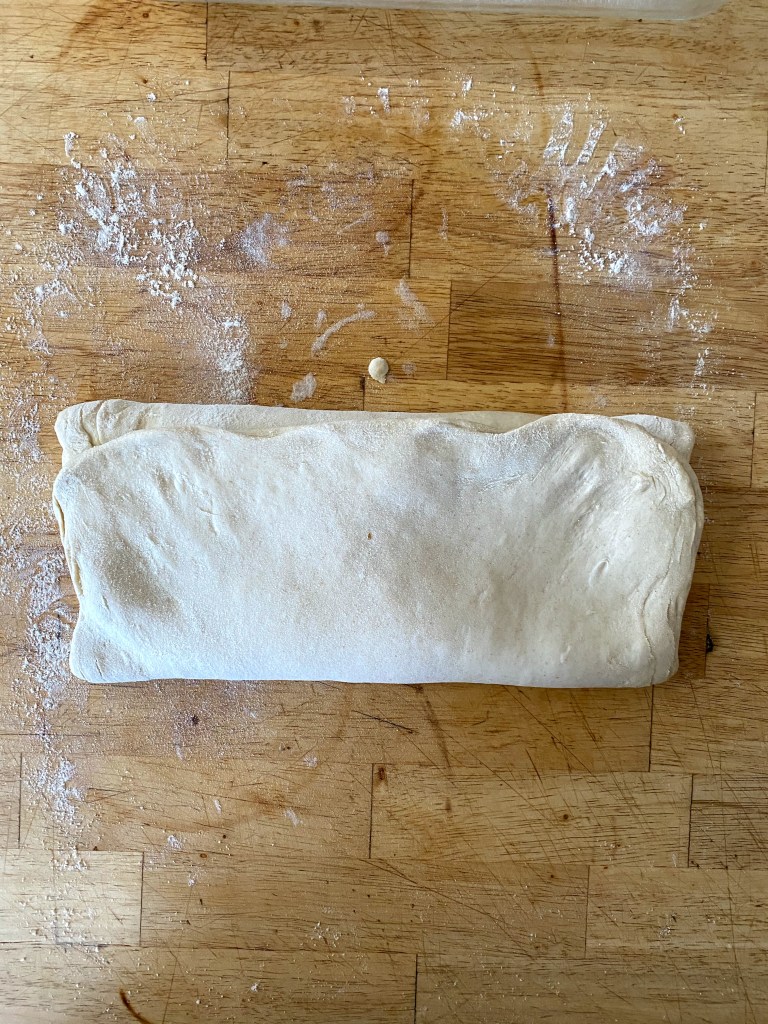
STEP 4: Envelope kneading & two 1-hour rests
- Lightly oil hands, and a rectangular baking pan
- Very lightly flour the countertop
- Turn dough out onto the countertop, using your dough scraper if neccessary, seam side up
- Pick up sides and gently pull out to achieve a rectangul measuring about 12″ x 20″. Pick up the top wide side, stretch it out, then fold it 1/3rd of the way down. Do the same with the bottom third: pick it up, stretch it out, then fold it up over the top. Like an letter for an envelope.
- Now fold the sides in. Pick up the left side, stretch it out, and fold it over 1/3rd of the way, then pick up the right side, stretch it out and fold it over.
- Cup your hands, around the dough, and rotate dough while tucking the sides under .
- Place the dough, seam-side down, in the baking pan, cover with oiled plastic wrap, and let rest 1 hour
- Lightly oil countertop and hands
- Repeat steps #3 – 8.


STEP 5: Shaping
- Line the 9″ x 13″ baking pan with a tea towel that’s been dusted with flour
- Lightly dust the work surface and your hands with flour.
- Turn the dough out onto the work surface and let it spread, then gently form it into an 8 x 13″ rectangle, by pressing to expand it, and stretching out the sides.
- Using a bench scraper, divide the dough into 4 equal pieces, each measuring about 2″ x 13″.
- Place first log, cut side down, onto the dusted tea towel, tent a portion to form a divider, then place the next one in. Repeat until thtey are all in, cut side down.
- Cover and let rest for 30 minutes.
- Place the covered pan in the fridge and chill for at least 12 hours.
STEP 6: Bake! (next day)
- Preheat the oven to 550° (it’s okay to just heat it to 500 if that’s as high as your oven goes)
- When hot, place a pan on the bottom rack, then add boiling water.
- Bring oven back up to 550 degrees and place an inverted baking sheet onto the middle rack
- Grab the edges of the tea towel and gently lift the loaves out of the pan.
- Spread the towel out flat.
- Use a bread board, (or piece of cardboard) gently flip the loaves off the towel onto a bread board (piece of cardboard), then flip onto a bread peel that’s been lined with parchment paper.
- Slide the loaves onto the inverted baking sheet.
- Lower oven temp to 450.
- Bake about 25 minutes until dark golden brown and sound hollow when tapped on the bottom
- Cool on wire rack – do not cut into them until they’ve cooled!!
- Let the bread cool completely before slicing and eating, at least 4 hours but preferably 8 to 24 hours.
