Week 70: No Knead Black Bread

This is an absolutley delicious bread, and easy to make. Even though it’s got a long list of ingredients, and is best made a couple of days prior to consuming it, don’t let that stop you from adding this to your repertoire! We serve this on Christmas Day because it it makes for an easy breakfast that blurs into lunch. It’s delicious with sweet or savory toppings: grava lax, smoked trout, egg salad, and fruit jams. And what at treat it is to watch Nigella Lawson, England’s very own domestic goddess, bake bread!

I’ve listed the ingredients below so that you can measure everything out ahead of time, and then follow along with the video. (I didn’t include the acitvated charcol, or the nigella seeds because I can’t find them). Also, the 2-lb pan she references is the same as a 9″x5″ loaf pan.

  • 400ml stout (14oz)
  • 1 egg white (save yolk for brushing on top just before baking)
  • 30g brown sugar
  • 2 Tbsp extra virgin olive oil
  • 2 Tbsp molasses
  • 300g dark rye flour
  • 300g bread flour
  • 25g cocoa powder
  • 4 tsp caraway seeds
  • 4 tsp fennel seeds
  • ¼ tsp yeast
  • 1¼ tsp salt
  • oil to grease pan

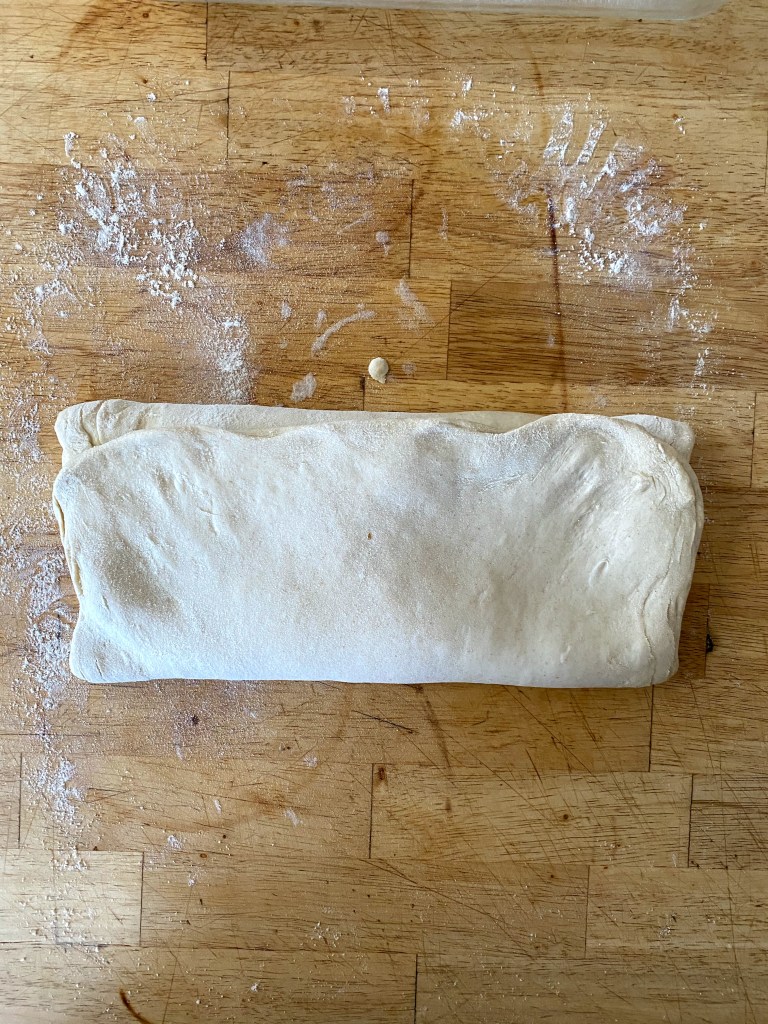
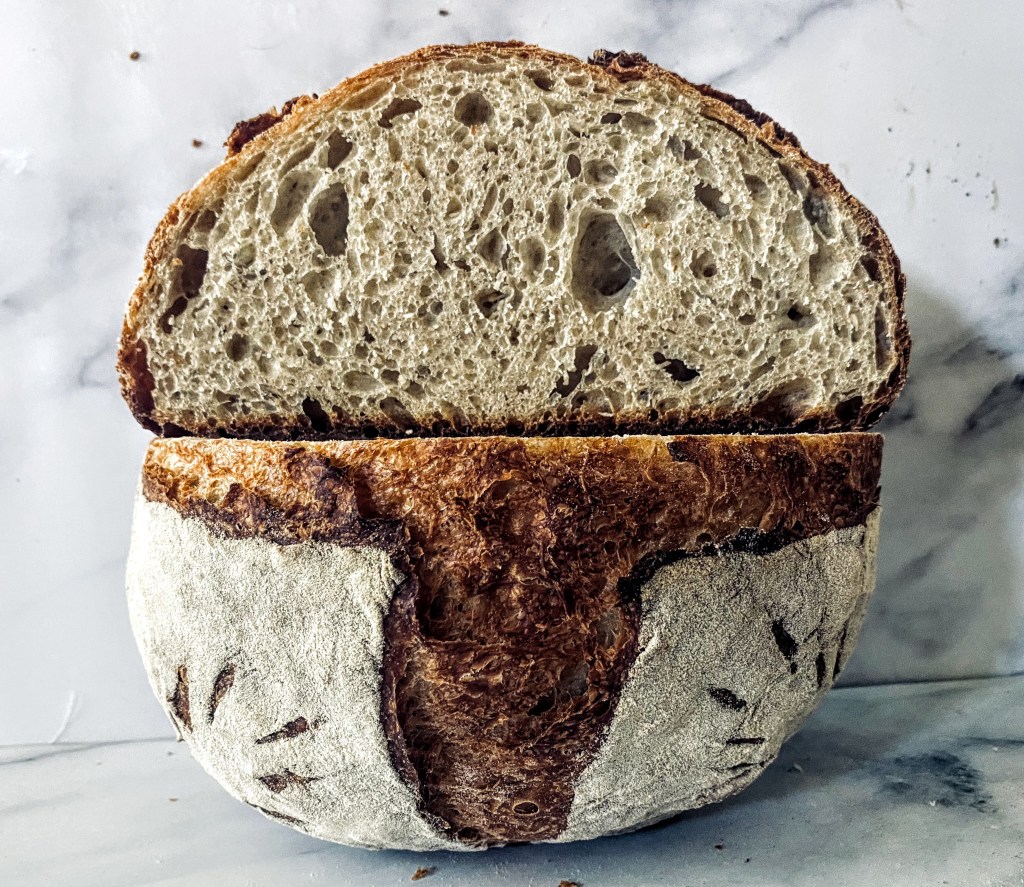
You can mix the dough, in the evening, then let it rest overnight, shape it the next day, then bake after the 2-hr rest. Or, mix it in the morning, let it rest all day, then shape it and refrigerate overnight. Pop it into the oven first thing in the morning (directly from the fridge, no need to do the 2-hr rise). Either way, it would benefit from not being cut open for another day, but it’s hard to wait for this one!

I would also score the top so that it splits evenly as it bakes.

Here’s a link to the written recipe, and below is the video. If you’re not familiar with Nigella Lawson, go ahead and open the link and read the recipe through, and be prepared to fall in love with the language she uses to describe and instruct. I also want to highlight this tip that she adds at the end: “Any leftover bread can be blitzed in the processor into fabulous black breadcrumbs. I keep them in the freezer to use whenever I want to add an aniseed crunch. They are particularly good sprinkled over a tomato salad.”

Week 69: Artisan Cinnamon Raisin

Here is a bread that everyone can make, because it doesn’t call for any fancy equipment (no stand mixer, no Dutch oven), and measurements are by volume, so you don’t even need a scale. All you need is time, because it does call for proofing overnight.

The recipe comes our way via the artisanbreadwithstev YouTube channel. Steve’s video instruction is straightforward and simple and gives everyone the ability to successfully bake beautiful loaves. I’ve listed the ingredients below so that you can have them at the ready while you follow along with the video.

  • 16 oz tap water
  • 1-1/2 tsp salt
  • 1-1/4 tsp yeast
  • 2 Tbsp brown sugar
  • 1 Tbsp cinnamon
  • 3-1/2 c bread flour
  • 1 cup raisins

I baked mine in a Dutch oven, but next time I’ll use his method of creating a Dutch oven out of two loaf pans. For breads like this, I actually prefer them to be baked in a loaf pan because then slices are uniform.

Week 68: Rustic Ciabatta

ITALY, by way of NEW ORLEANS: It took me a long time to find a recipe for a ciabatta that was not made with 100% white flour. and that actually worked (whole wheat can be tricky to work with). This is from Bellgarde Bakery in New Orleans, whose mission is to “connect community and ecology through gastronomy”. All of their grains are identity preserved and single origin, and they use olive oil sourced from San Antonio, and salt from Avery Island.

Continue reading “Week 68: Rustic Ciabatta”

Week 66: Pane Francese

ITALY: Looks like a baguettte, but tastes like a ciabatta – what could be more perfect? This Italian “French bread” has a creamy chewy interior, a dark exterior, and gets its flavor boost from two overnight fermentations, and an addition of milk and olive oil in the dough.

I could only find a few verisons of this bread, and they varied widely. I tested three (all from cookbooks: The Italian Baker, Bread Illustrated, and Bien Cuit: The Art of Bread), then concluded that although they each had some great points, they also came with some tricky and/or non-authentic steps. So, I did a fourth test using what I’d learned from the first three and came up with this method below, which worked out really well.

I found Kingdom Bread’s instructional video to be really useful, and recommend watching it to get an idea of what the process will be (linked below as well). You’ll need a tea towel, and a spray bottle before you get started.

STEP 1: Make the biga (pre-ferment)

  • 300g white flour
  • 1/8 tsp yeast
  • 300g water 
  1. Mix biga ingredients in medium bowl until thoroughly incorporated. I use two chopsticks, then scrape the sides of the bowl down with a dough scraper.
  2. Cover and let rest overnight for 10-13 hours.

STEP 2: Make dough (next day)

  • 450g white flour
  • 50g whole wheat flour
  • 2-1/2 tsp salt
  • 1/4 tsp (heaping) yeast
  • 235g whole milk
  • 70g extra-virgin olive oil
  1. Measure the flour, salt, and yeast into the bowl of a stand mixer.
  2. Pour some of the milk around the sides of the biga, then scrape the sides inward to help release it from the bowl.
  3. Turn the biga out into the stand mixer, using a dough scraper it it doesn’t slide out easily.
  4. Add the olive oil and the rest of the milk.
  5. Mix, with dough hook attachment, for 4 minutes on speed #1, and then for 5~6 minutes on speed #2.

STEP 3: Rock & Roll kneading

  1. Lightly oil work surface and hands.
  2. Slide dough of the dough hook, and then empty dough out onto the lightly oiled work surface
  3. Gently press dough into a rectangular shape, then do 10 “roll and folds” (video instruction below). It might seem tricky at first, but keep going. You will eventually get there!
  4. Tuck in sides with your hands, then place in an oiled bowl, seam side down.
  5. Cover and let rest 1 hour

STEP 4: Envelope kneading & two 1-hour rests

  1. Lightly oil hands, and a rectangular baking pan
  2. Very lightly flour the countertop
  3. Turn dough out onto the countertop, using your dough scraper if neccessary, seam side up
  4. Pick up sides and gently pull out to achieve a rectangul measuring about 12″ x 20″. Pick up the top wide side, stretch it out, then fold it 1/3rd of the way down. Do the same with the bottom third: pick it up, stretch it out, then fold it up over the top. Like an letter for an envelope.
  5. Now fold the sides in. Pick up the left side, stretch it out, and fold it over 1/3rd of the way, then pick up the right side, stretch it out and fold it over.
  6. Cup your hands, around the dough, and rotate dough while tucking the sides under .
  7. Place the dough, seam-side down, in the baking pan, cover with oiled plastic wrap, and let rest 1 hour
  8. Lightly oil countertop and hands
  9. Repeat steps #3 – 8.

STEP 5: Shaping

  1. Line the 9″ x 13″ baking pan with a tea towel that’s been dusted with flour
  2. Lightly dust the work surface and your hands with flour.
  3. Turn the dough out onto the work surface and let it spread, then gently form it into an 8 x 13″ rectangle, by pressing to expand it, and stretching out the sides.
  4. Using a bench scraper, divide the dough into 4 equal pieces, each measuring about 2″ x 13″.
  5. Place first log, cut side down, onto the dusted tea towel, tent a portion to form a divider, then place the next one in. Repeat until thtey are all in, cut side down.
  6. Cover and let rest for 30 minutes.
  7. Place the covered pan in the fridge and chill for at least 12 hours.

STEP 6: Bake! (next day)

  1. Preheat the oven to 550° (it’s okay to just heat it to 500 if that’s as high as your oven goes)
  2. When hot, place a pan on the bottom rack, then add boiling water.
  3. Bring oven back up to 550 degrees and place an inverted baking sheet onto the middle rack
  4. Grab the edges of the tea towel and gently lift the loaves out of the pan.
  5. Spread the towel out flat.
  6. Use a bread board, (or piece of cardboard) gently flip the loaves off the towel onto a bread board (piece of cardboard), then flip onto a bread peel that’s been lined with parchment paper.
  7. Slide the loaves onto the inverted baking sheet.
  8. Lower oven temp to 450.
  9. Bake about 25 minutes until dark golden brown and sound hollow when tapped on the bottom
  10. Cool on wire rack – do not cut into them until they’ve cooled!!
  11. Let the bread cool completely before slicing and eating, at least 4 hours but preferably 8 to 24 hours.

Week 62: Low-Knead Bread

I don’t know what I enjoy more: eating bread or baking bread. But sometimes, when I set out to make it because I really want to eat it, I run into a problem with timing. Oftentimes, there’s a long stretch of time between starting the process to consuming the bread. Most artisan loaves aren’t ready on the same day as you prepare the dough because they require an overnight rise, and if you don’t get around to starting until late in the day, there’s not enough time for all of the steps.

Last week I tested a work-around that produces a delicious, satisfying, impressive loaf in 5 hours from start to finish. It’s as beautiful as a sourdough, but a lot less complicated, and not as time-consuming. It’s easy like the no-knead method, but incorporates a bit of “stretch & fold” kneading (see #2 Kneading During Proofing video here) to speed up the process of strengthening the gluten, thereby avoiding the overnight soak, i.e. autolyse*.

Back in 2006, the New York Times published Jim Lahey’s No-Knead Bread, which revolutionized bread baking. Two years later, Cook’s Illustrated introduced us to J. Kenji Lopez-Alt’s version, Almost No-Knead Bread. And just last month, in May of 2021, he gave us No-Knead Bread, Revisited, which is what I’ve based mine on. I didn’t use vinegar, added some honey, substituted whole wheat and rye for some of the white flour, cut the time down by 30 minutes and used a Dutch oven to bake.

Rest times are 1 hour + 1.5 hours + 1 hour, so perfect if you work from home, and doable if you work away from home because you can make it in the evening, pop it in the fridge after the final rise, then bake the next day.

STEP 1: Make dough

  • 300g bread or all-purpose flour (or substitute 50g with whole wheat or rye, or 25g of both)
  • 7g salt
  • 3g yeast
  1. Measure dry ingredients in a bowl and mix (I use a whisk) to combine.
  • 225g warm water
  • 11g honey
  1. Add honey to water and stir to combine
  2. Mix honey water into dry ingredients, using the handle of a wooden spoon, or your hand. Make sure there are no dry bits.
  3. Cover and rest 1 hour

STEP 2: Knead & Proof

  1. Keeping dough in the bowl, do a round of stretch and folds, then cover and let rest 30 minutes. See kneading during proofing, and shaping videos here. (#1 stretch + fold | 30 minutes rest total so far)
  2. Repeat this two more times. Each time you can pull the dough out a little longer, but not too much so that it tears. Only do four stretch and folds each round. (1.5 minute rest so far)
  3. Do one more stretch + fold, then leave to rest for 1 hour.

STEP 3: Final rise

  1. Carefully remove dough to a lightly floured surface, without deflating it.
  2. Pull sides to shape into a tight ball, then turn over, and with cupped hands, tighten surface some more.
  3. Place in lined and floured proofing basket seam side up and cover
  4. Proof 1 hour or until finger test, and preheat oven to 500. It’s better to be under proofed than over proofed, so check often:
    1. Dough is under proofed when you poke a finger in it and is springs back quickly
    2. Dough is proofed when you poke a finger in it and it springs back slowly
    3. Dough is over proofed if you poke a finger in it and it doesn’t spring back.
  5. Cover with parchment, then a cutting board and turn over
  6. Slowly remove basket and score. Score round loaves symetircally and mostly on the top, so they rise up, not out
  7. Bake, covered, at 475 for 25 minutes
  8. Remove cover and bake for 10 minutes.
    1. Put a cookie sheet on the lowest rack to redirect the heat so the bottom doesn’t burn
  9. Let cool completely before slicing

Week 58: Same Day Sourdough

Baking a sourdough loaf is a two-day affair, because there are so many stages in the prepping and proofing. I set out to find if it was possible to a.) make a loaf in one day, and b.) be 100% satisfied with the result. And, I’m here to tell you that there is! This is a method for baking a sourdough loaf with no overnight rise, and if you get started early enough, (8:00 AM) you’ll have a warm loaf to bring to the dinner table.

Continue reading “Week 58: Same Day Sourdough”

Week 56: Sourdough

If you do a Google search for sourdough recipes, you’ll get 25,600,000 results. There is a ton of information — and misinformation — to sift through. I tested five different methods and this version, from Full Proof Baking’s Kristen Dennis was the clear winner. Although it is time consuming, and a little tricky, the instructions are very detailed and the steps are demonstrated on the video, linked below. This is an all day affair — a perfect loaf for #bakingwhileworking.

Continue reading “Week 56: Sourdough”